
SKU: OT620-B36 Numéro d’article: YQ939 EAN: 8720828223031

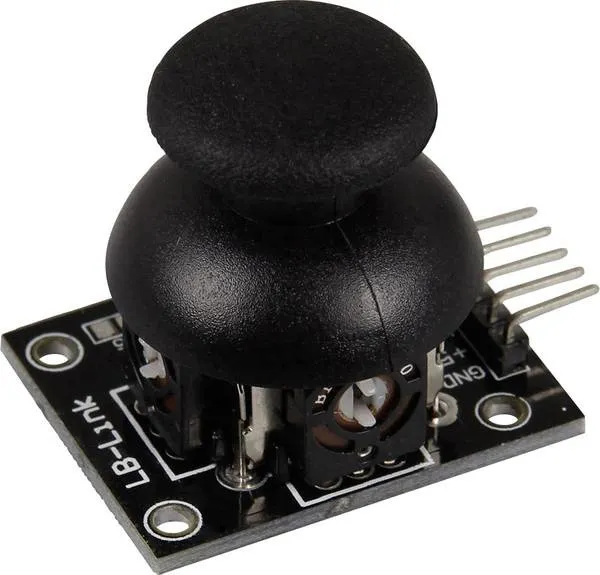
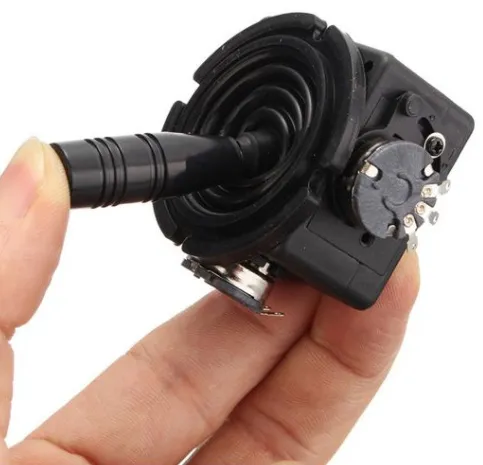
Avec cette carte, les positions X et Y du joystick peuvent être affichées sous forme de tension analogique sur les broches de sortie. Convient notamment pour des projets Arduino, Raspberry Pi, ESP8266 ou ESP32.
consultez ici le schéma de câblage et le code d'exemple >>>
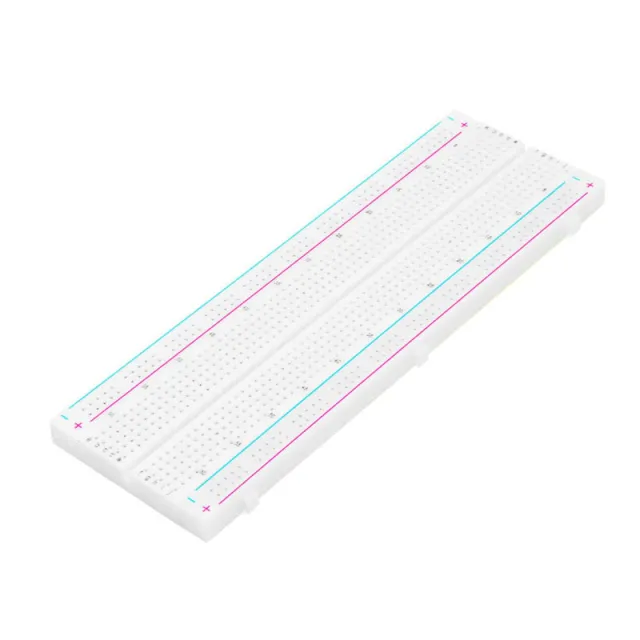
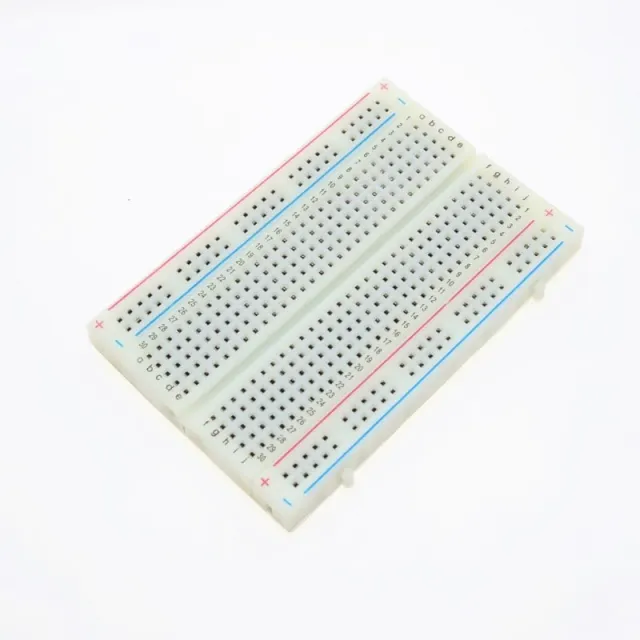
Le module peut être soudé ou utilisé sur une breadboard.
Plage de tension : 0 - 5 V
Tension de fonctionnement : 3,3 - 5V
Dimensions : 34 x 39 x 26 mm
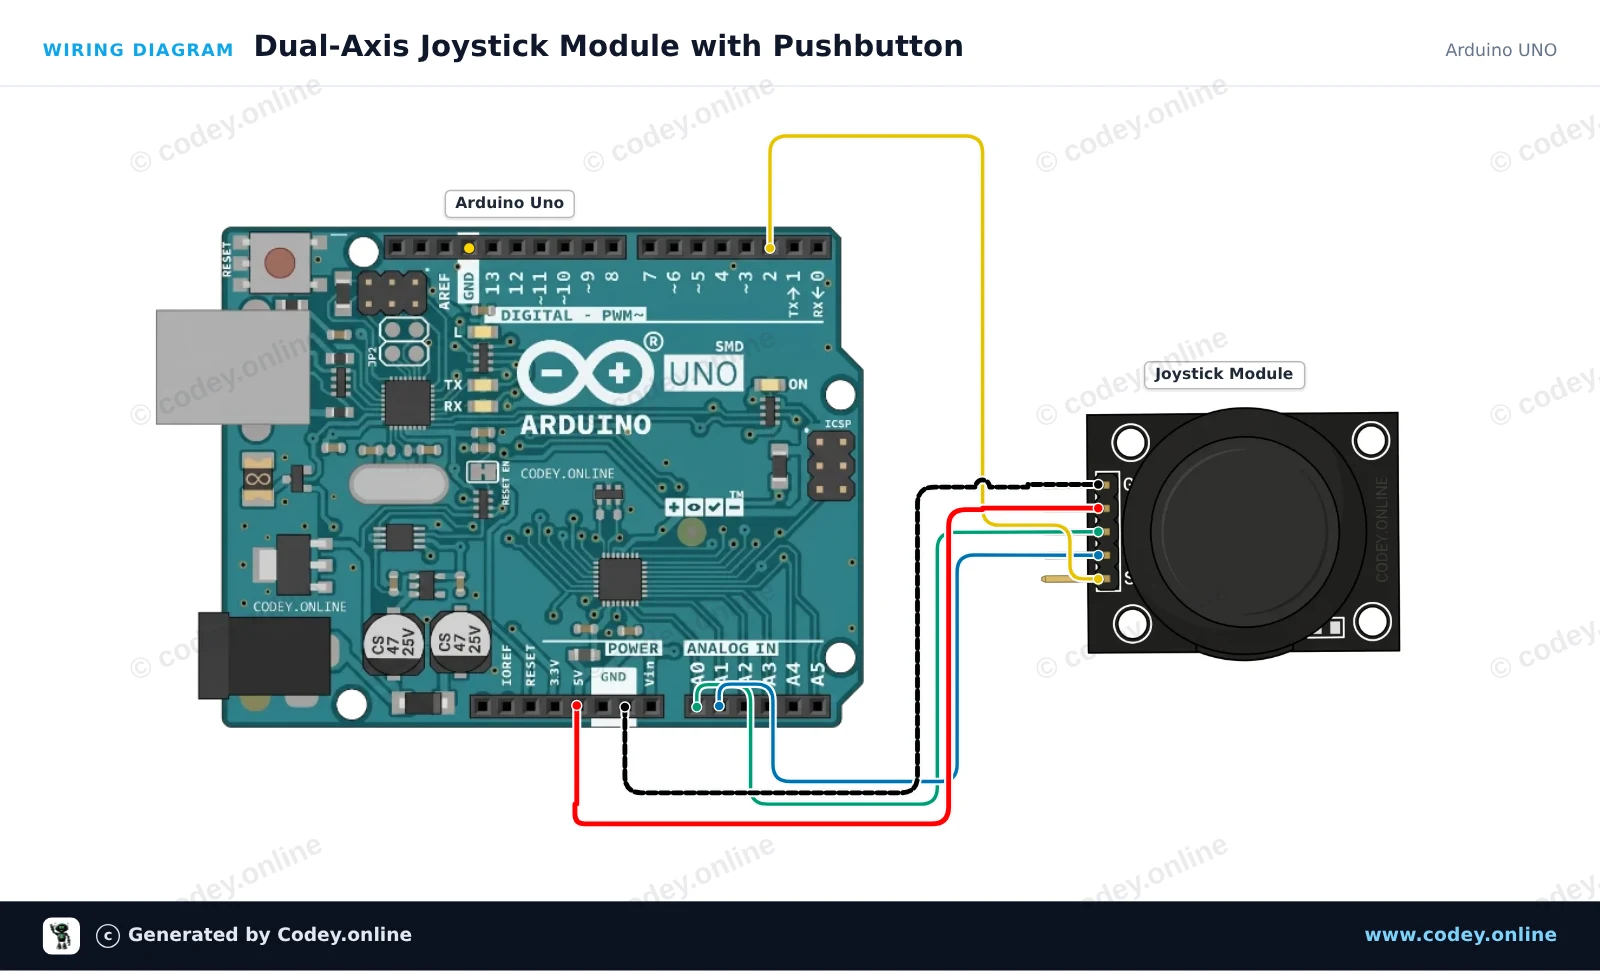
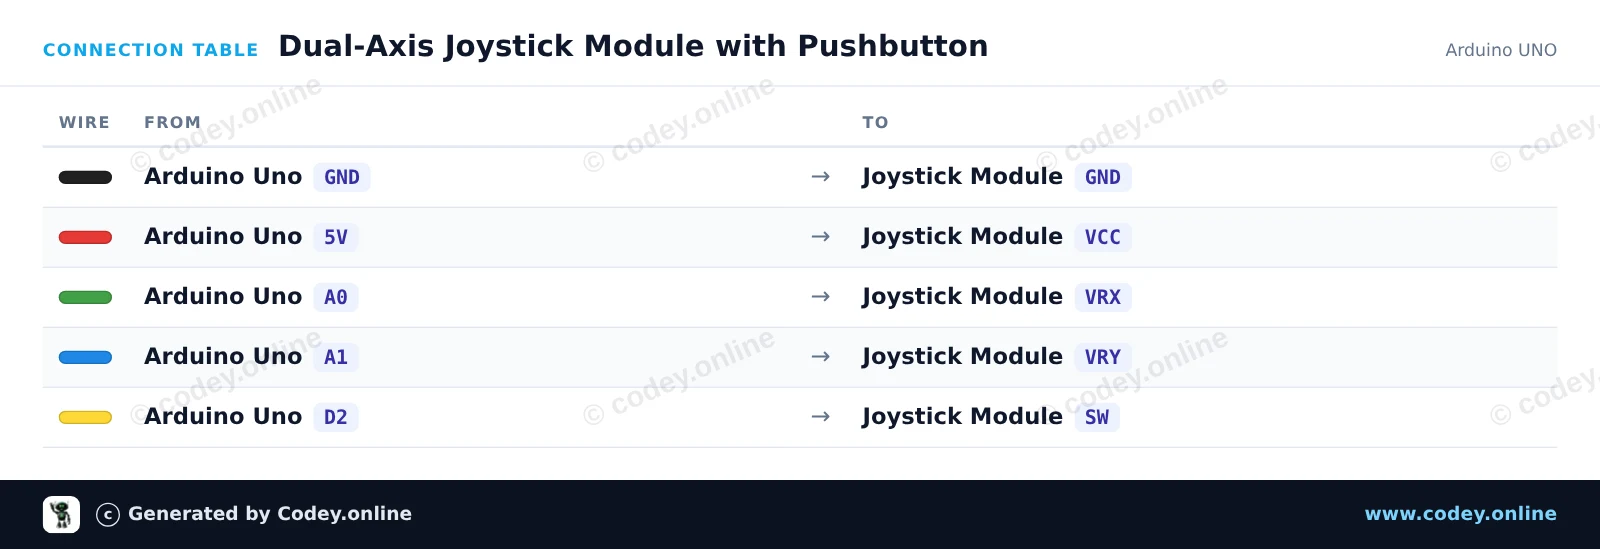
Voici comment connecter le Module joystick à un Arduino UNO ou à un ESP32, avec un exemple de sketch que tu peux téléverser directement.
Cet exemple lit les positions analogiques des axes X et Y ainsi que le bouton-poussoir intégré du module joystick. Déplacez le stick ou appuyez dessus pour voir les valeurs de position en temps réel et l'état du bouton dans le Serial Monitor.
/*
 * ==================================================================
 *  Generated by Codey.online  —  https://www.codey.online
 * ==================================================================
 *  Project   : Dual-Axis Joystick Module with Pushbutton
 *  Board     : Arduino UNO (arduino:avr:uno)
 *  Parts     : Joystick module
 *  Libraries : none (built-in)
 *
 *  Codey Online is an AI-powered browser IDE for Arduino and ESP32.
 *  Describe your project and Codey writes the code, draws the wiring
 *  diagram and uploads it to your board, straight from the browser.
 *  This code is free to use, modify and share, without warranty.
 * ==================================================================
 */

// Pin definitions
const int PIN_X = A0;
const int PIN_Y = A1;
const int PIN_SW = 2;

void setup() {
  // Enable internal pull-up resistor for the integrated pushbutton
  pinMode(PIN_SW, INPUT_PULLUP);

  Serial.begin(115200);
  Serial.println(F("Joystick Module Demo"));
  Serial.println(F("--------------------"));
}

void loop() {
  // Read analog values for X and Y axes (range: 0 - 1023)
  int xVal = analogRead(PIN_X);
  int yVal = analogRead(PIN_Y);

  // Button is active-low (reads LOW when pressed)
  bool isPressed = (digitalRead(PIN_SW) == LOW);

  // Print the results to Serial Monitor
  Serial.print(F("X: "));
  Serial.print(xVal);
  Serial.print(F(" | Y: "));
  Serial.print(yVal);
  Serial.print(F(" | Button: "));
  Serial.println(isPressed ? F("PRESSED") : F("RELEASED"));

  delay(150);
}Wiring diagram and example code generated by Codey.online — https://www.codey.online
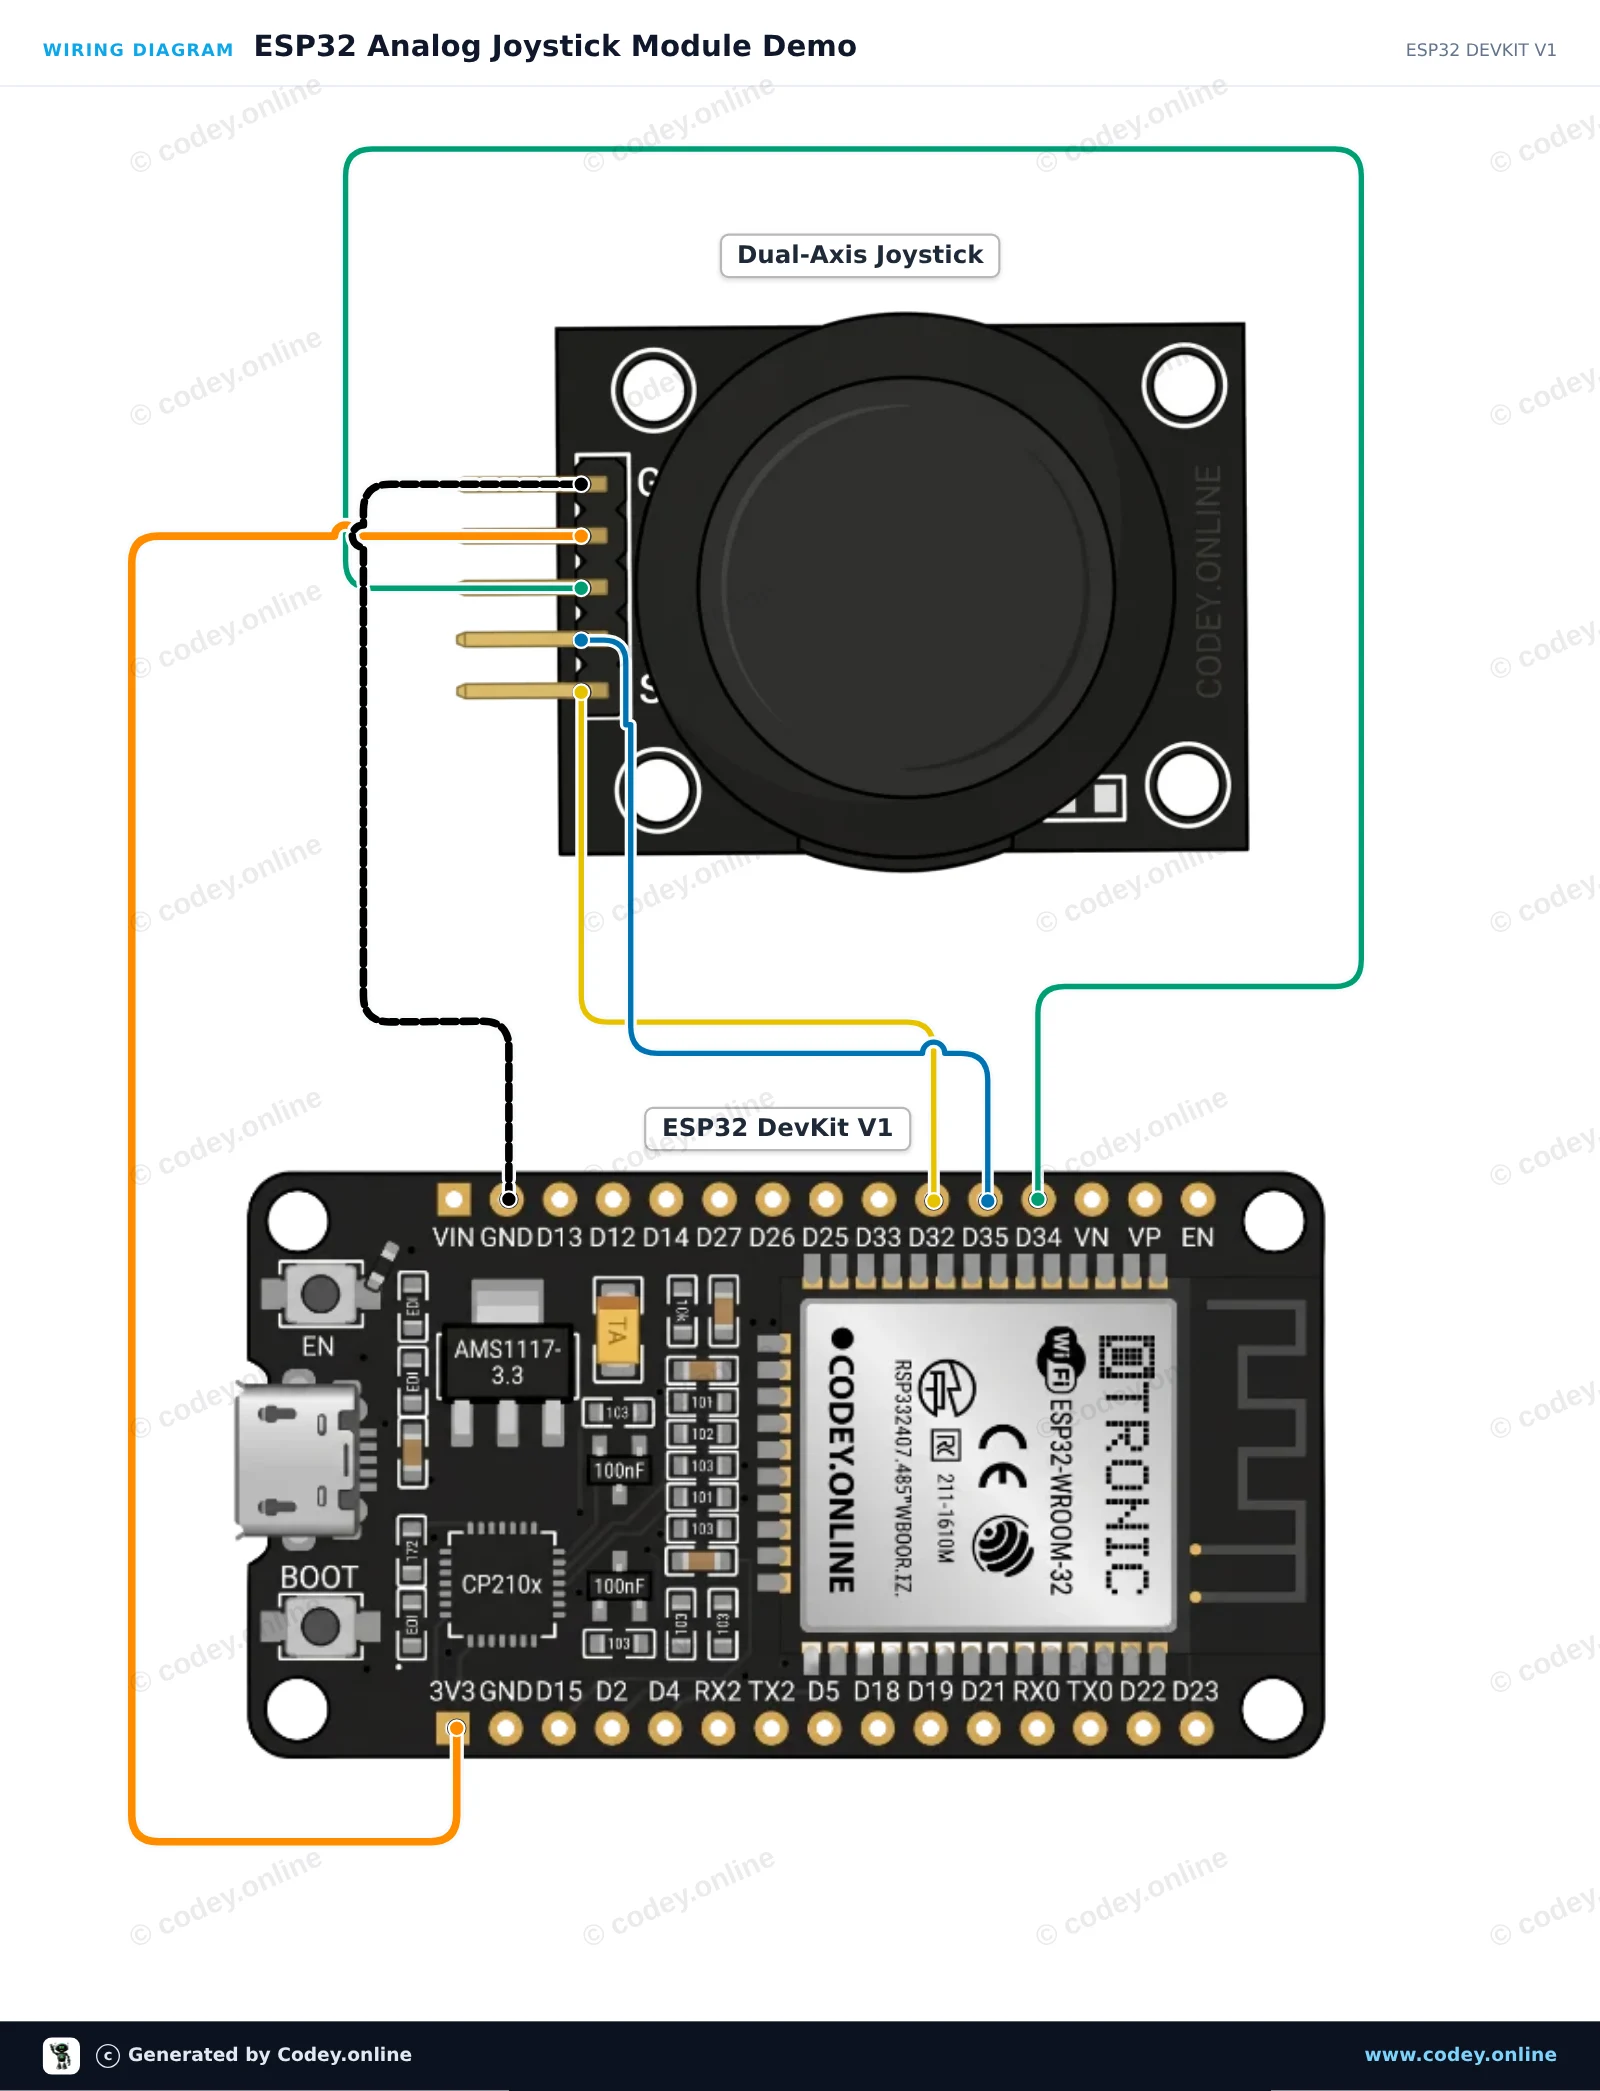
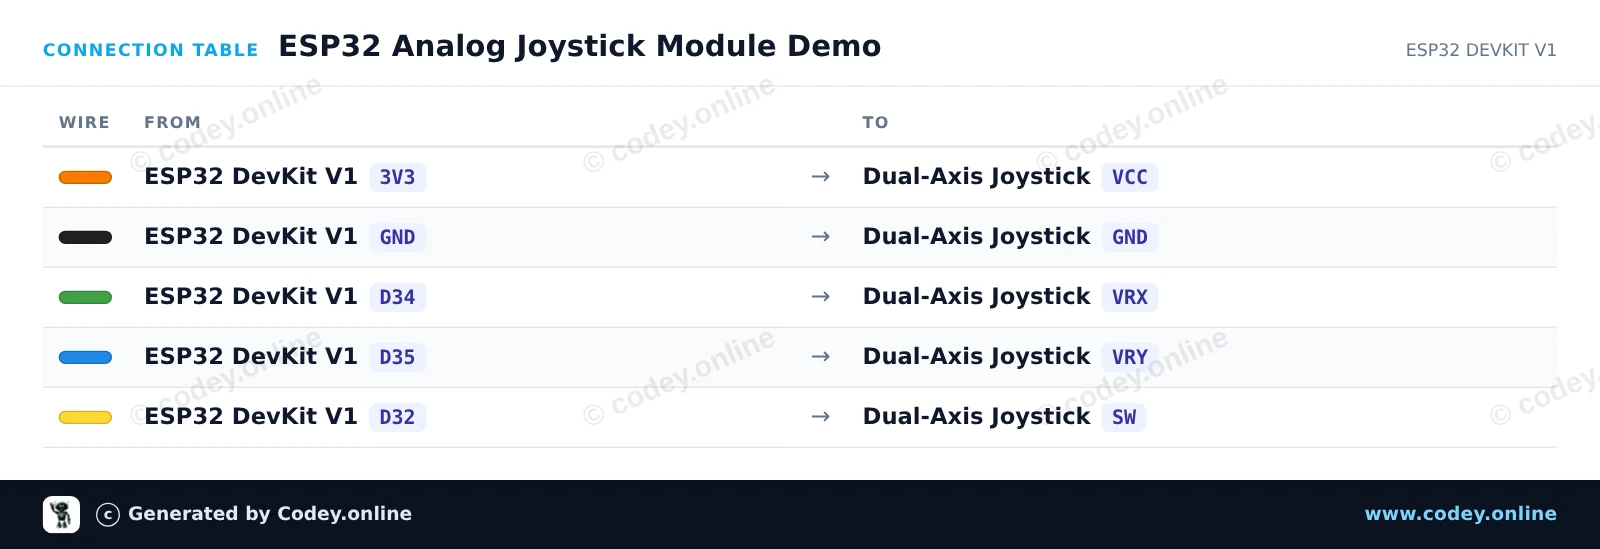
Ce projet lit les positions X et Y ainsi que l’état du bouton-poussoir intégré d’un module joystick analogique à deux axes. L’ESP32 lit les tensions analogiques via GPIO 34 et 35, et l’état du bouton via GPIO 32. Ouvrez le Moniteur série à 115200 baud pour voir en temps réel les coordonnées du joystick et les appuis sur le bouton.
/*
 * ==================================================================
 *  Generated by Codey.online  —  https://www.codey.online
 * ==================================================================
 *  Project   : ESP32 Analog Joystick Module Demo
 *  Board     : ESP32 DEVKIT V1 (esp32:esp32:esp32doit-devkit-v1)
 *  Parts     : Joystick module
 *  Libraries : none (built-in)
 *
 *  Codey Online is an AI-powered browser IDE for Arduino and ESP32.
 *  Describe your project and Codey writes the code, draws the wiring
 *  diagram and uploads it to your board, straight from the browser.
 *  This code is free to use, modify and share, without warranty.
 * ==================================================================
 */

// Pin definitions (using bare GPIO numbers for ESP32)
const int pinVRX = 34;
const int pinVRY = 35;
const int pinSW  = 32;

void setup() {
  Serial.begin(115200);

  // Configure push-button pin with internal pull-up
  pinMode(pinSW, INPUT_PULLUP);
}

void loop() {
  // Read analog values from joystick potentiometers (0 - 4095 on ESP32)
  int xVal = analogRead(pinVRX);
  int yVal = analogRead(pinVRY);

  // Read digital state of the integrated switch (LOW when pressed)
  bool isPressed = (digitalRead(pinSW) == LOW);

  // Print the readings to the Serial Monitor
  Serial.print("X: ");
  Serial.print(xVal);
  Serial.print(" | Y: ");
  Serial.print(yVal);
  Serial.print(" | Button: ");
  Serial.println(isPressed ? "PRESSED" : "RELEASED");

  delay(100);
}Wiring diagram and example code generated by Codey.online — https://www.codey.online






 English
  Nederlands
  Deutsch
  Italiano
  Español
  Suomi
Suomi  Polski
  Dansk
Dansk  Ελληνικά
  Български
  Čeština
  Hrvatski
  Aileen