SKU: OT2020-D106 Numéro d’article: AB081 EAN: 8455269820906

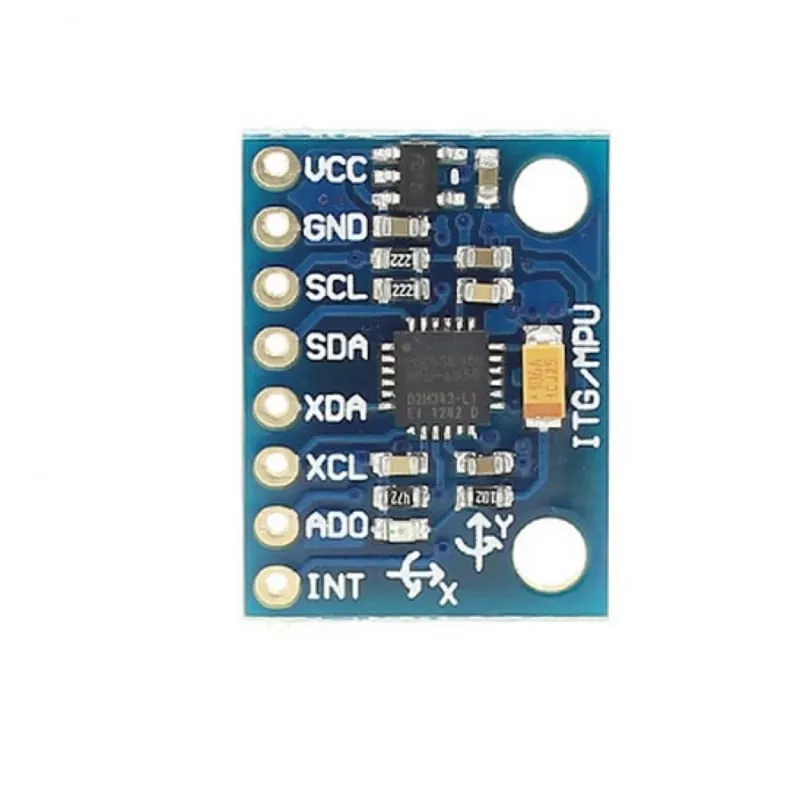
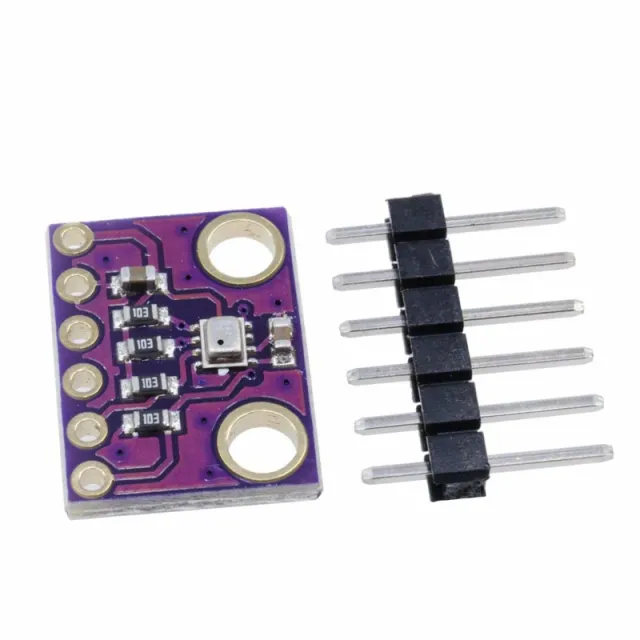
Le module MPU-6050 intègre un capteur d’accélération à 3 axes et un gyroscope à 3 axes. En plus d’un encombrement réduit par rapport aux solutions individuelles, ce module résout également les problèmes de différences dans les systèmes multi-composants typiques.
La base de données InvenSense intégrée réduit le traitement complexe et fournit un cadre pour le développement d’applications et d’API.
I2C jusqu’à 400 kHz est disponible pour la transmission des données.
Données techniques
- Module MPU-6050 (gyro à trois axes + accélération à trois axes)
- Alimentation : 3- 5 V (différentiel basse tension interne)
- Communication : protocole de communication IIC standard
- Puce avec convertisseur AD 16 bits intégré, sortie de données 16 bits
- Plage du gyroscope : ±250, ±500, ±1000, ±2000 °/ s (16 bits)
- Plage d’accélération : ±2, ±4, ±8, ±16 g (16 bits)
- capteur de température intégré
Exemples d’utilisation
- Jeux de détection de mouvement
- réalité augmentée
- stabilisation électronique & optique de l’image
Dimensions
Longueur : 2,1cm
Largeur : 1,6cm
Hauteur : 0,34cm
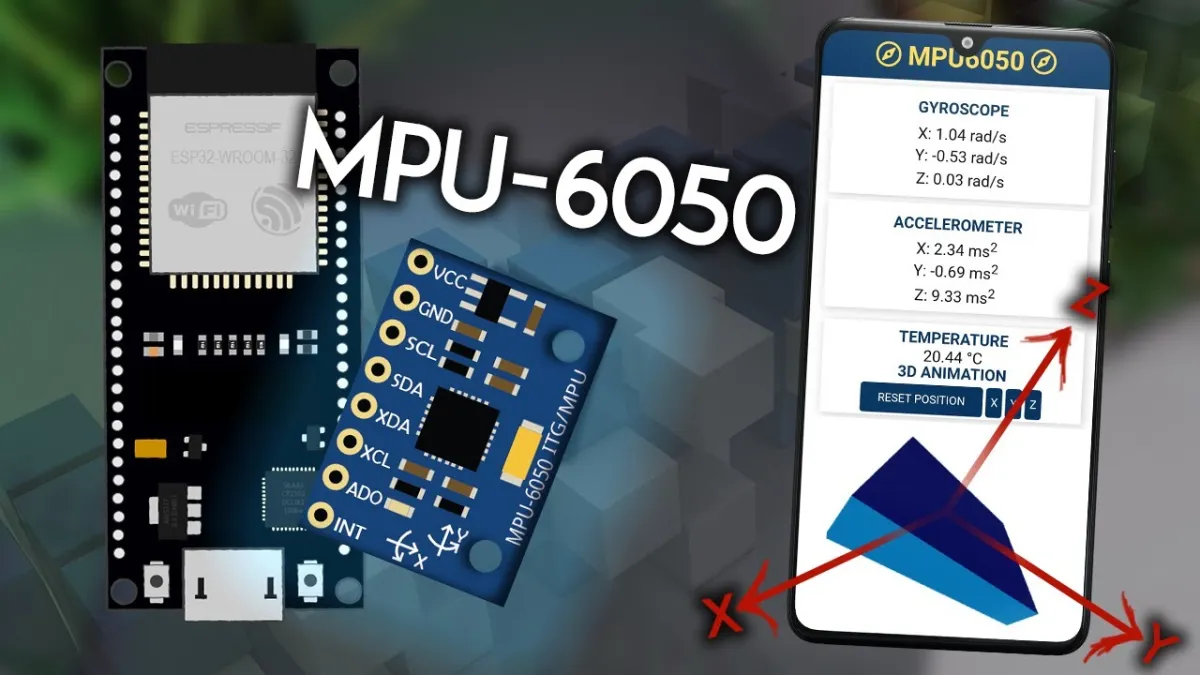
La lecture charge la vidéo depuis YouTube.
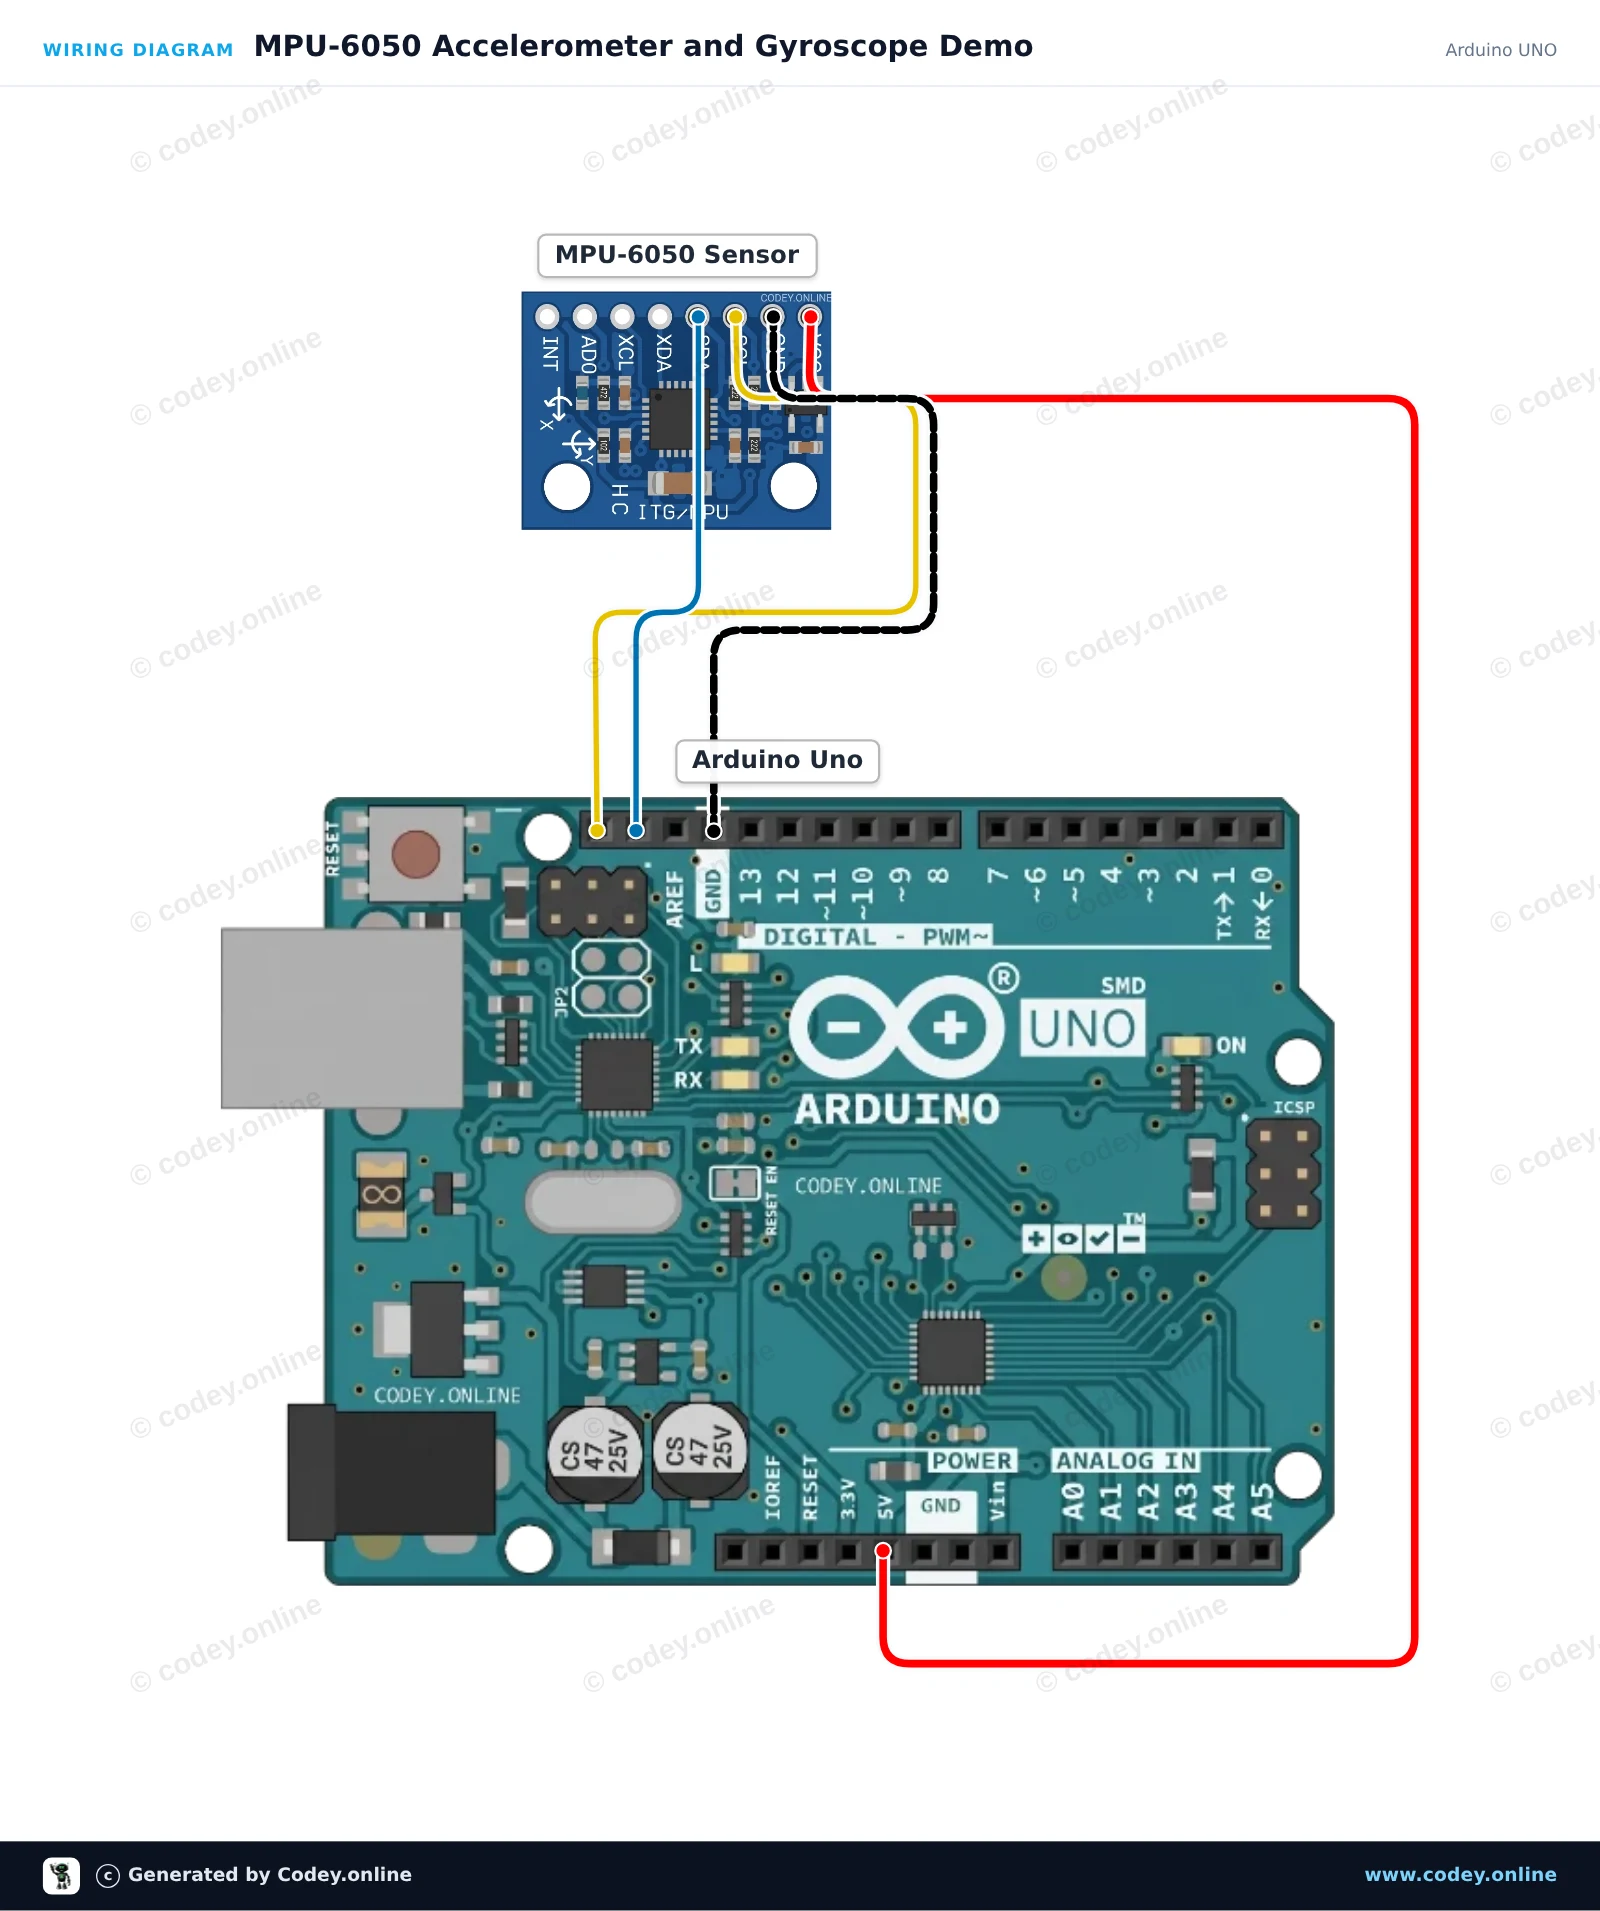
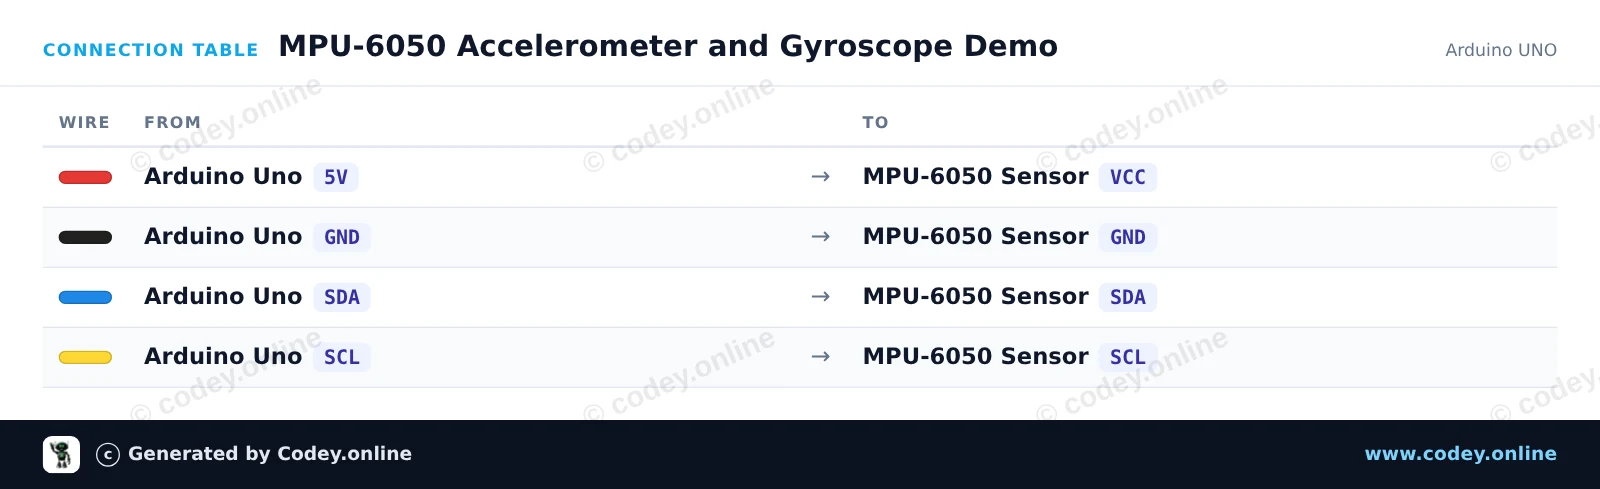
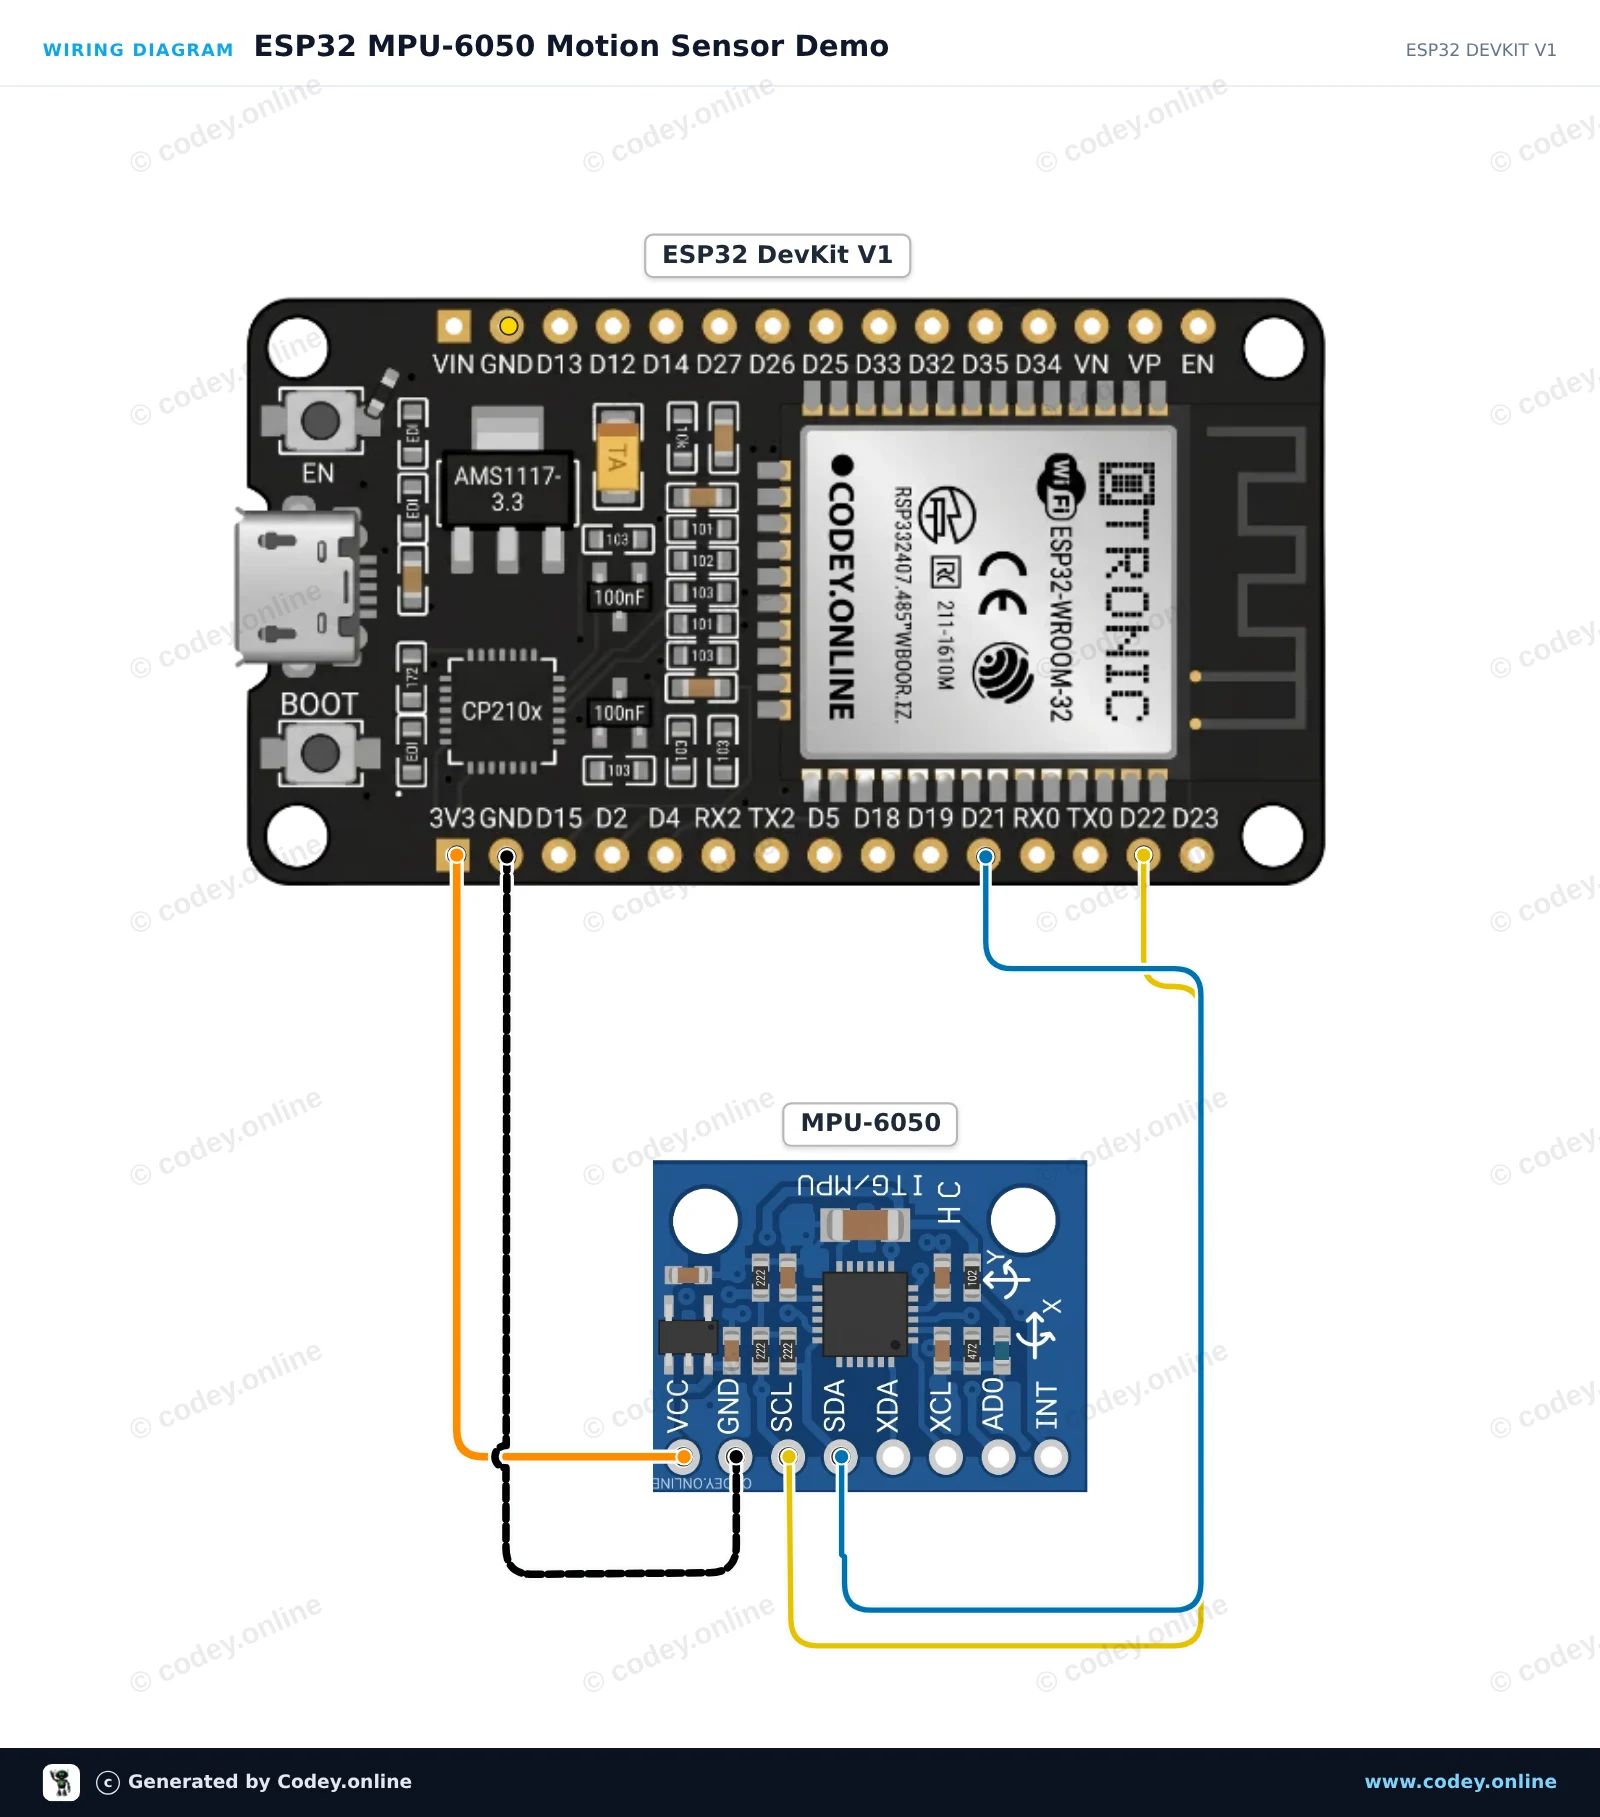
Voici comment connecter le Accéléromètre et gyroscope à accélération I2C - MPU-6050 à un Arduino UNO ou à un ESP32, avec un exemple de sketch que tu peux téléverser directement.
Ce projet lit les données d’accélération et de vitesse angulaire du capteur de suivi de mouvement 6 axes MPU-6050 via I2C. Connectez le capteur à l’Arduino Uno, téléversez le code et ouvrez le Serial Monitor à 115200 baud pour afficher les mesures de mouvement en temps réel lorsque vous inclinez et faites pivoter le module.
/*
 * ==================================================================
 *  Generated by Codey.online  —  https://www.codey.online
 * ==================================================================
 *  Project   : MPU-6050 Accelerometer and Gyroscope Demo
 *  Board     : Arduino UNO (arduino:avr:uno)
 *  Parts     : Accelerometer and Gyroscope I2C MPU-6050
 *  Libraries : Adafruit MPU6050 2.2.9, Adafruit Unified Sensor 1.1.15, Adafruit BusIO 1.17.4
 *
 *  Codey Online is an AI-powered browser IDE for Arduino and ESP32.
 *  Describe your project and Codey writes the code, draws the wiring
 *  diagram and uploads it to your board, straight from the browser.
 *  This code is free to use, modify and share, without warranty.
 * ==================================================================
 */

#include <Wire.h>
#include <Adafruit_MPU6050.h>
#include <Adafruit_Sensor.h>

Adafruit_MPU6050 mpu;

void setup() {
  Serial.begin(115200);
  while (!Serial) {
    delay(10);
  }

  Serial.println(F("Initializing MPU-6050..."));
  if (!mpu.begin()) {
    Serial.println(F("Failed to find MPU-6050 chip. Check connections!"));
    while (1) {
      delay(10);
    }
  }
  Serial.println(F("MPU-6050 initialized successfully!"));

  // Configure sensor ranges and filter bandwidth
  mpu.setAccelerometerRange(MPU6050_RANGE_8_G);
  mpu.setGyroRange(MPU6050_RANGE_500_DEG);
  mpu.setFilterBandwidth(MPU6050_BAND_21_HZ);
}

void loop() {
  sensors_event_t a, g, temp;
  mpu.getEvent(&a, &g, &temp);

  // Print acceleration in m/s^2
  Serial.print(F("Accel (m/s^2) X: "));
  Serial.print(a.acceleration.x, 2);
  Serial.print(F(", Y: "));
  Serial.print(a.acceleration.y, 2);
  Serial.print(F(", Z: "));
  Serial.print(a.acceleration.z, 2);

  // Print rotation rate in rad/s
  Serial.print(F(" | Gyro (rad/s) X: "));
  Serial.print(g.gyro.x, 2);
  Serial.print(F(", Y: "));
  Serial.print(g.gyro.y, 2);
  Serial.print(F(", Z: "));
  Serial.print(g.gyro.z, 2);

  // Print onboard temperature
  Serial.print(F(" | Temp: "));
  Serial.print(temp.temperature, 1);
  Serial.println(F(" C"));

  delay(500);
}Bibliothèques nécessaires : Adafruit MPU6050 2.2.9, Adafruit Unified Sensor 1.1.15, Adafruit BusIO 1.17.4
Wiring diagram and example code generated by Codey.online — https://www.codey.online
Ce projet lit l’accélération sur 3 axes, la vitesse de rotation et la température du capteur MPU-6050 via I2C. L’ESP32 lit les données du capteur à 10 Hz et affiche des valeurs formatées dans le Serial Monitor à 115200 baud. Ouvrez le Serial Plotter pour voir des graphiques en direct des mouvements du capteur.
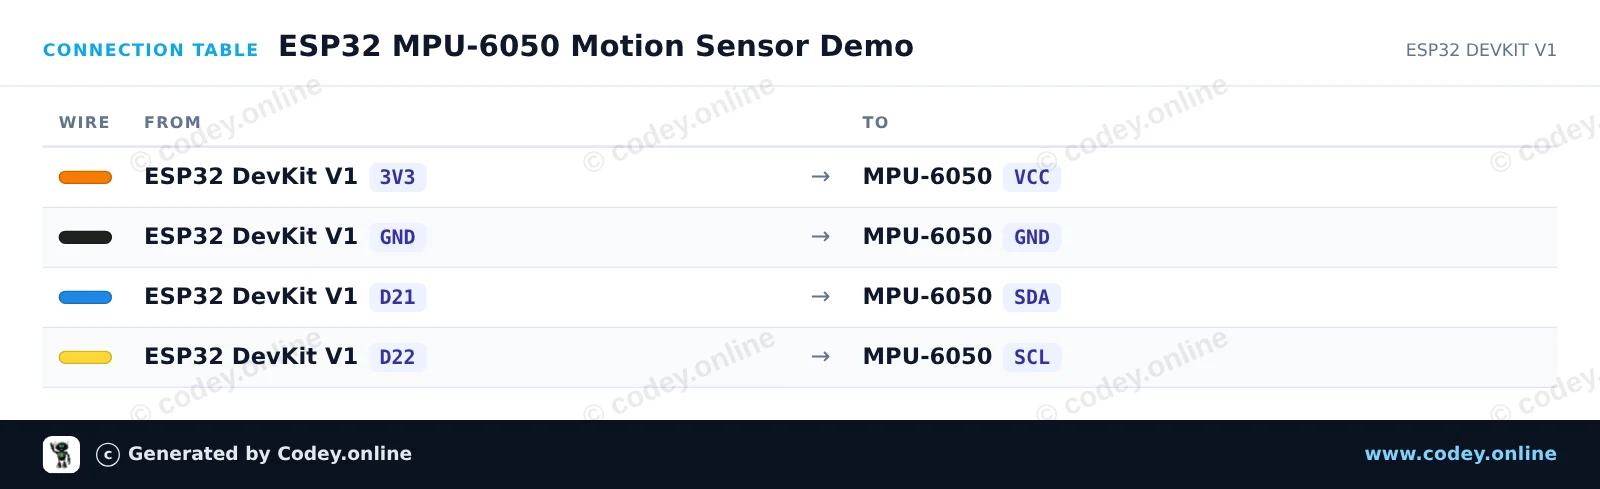
/*
 * ==================================================================
 *  Generated by Codey.online  —  https://www.codey.online
 * ==================================================================
 *  Project   : ESP32 MPU-6050 Motion Sensor Demo
 *  Board     : ESP32 DEVKIT V1 (esp32:esp32:esp32doit-devkit-v1)
 *  Parts     : Accelerometer and Gyroscope I2C MPU-6050
 *  Libraries : Adafruit MPU6050 2.2.9, Adafruit Unified Sensor 1.1.15
 *
 *  Codey Online is an AI-powered browser IDE for Arduino and ESP32.
 *  Describe your project and Codey writes the code, draws the wiring
 *  diagram and uploads it to your board, straight from the browser.
 *  This code is free to use, modify and share, without warranty.
 * ==================================================================
 */

#include <Adafruit_MPU6050.h>
#include <Adafruit_Sensor.h>
#include <Wire.h>

Adafruit_MPU6050 mpu;

void setup() {
  Serial.begin(115200);
  while (!Serial) delay(10);

  Serial.println("Initializing MPU-6050...");

  // Initialize I2C on ESP32 default pins: SDA (GPIO 21), SCL (GPIO 22)
  Wire.begin(21, 22);

  if (!mpu.begin(0x68, &Wire)) {
    Serial.println("Failed to find MPU-6050 chip!");
    while (1) {
      delay(10);
    }
  }

  Serial.println("MPU-6050 Found!");

  // Configure sensor ranges
  mpu.setAccelerometerRange(MPU6050_RANGE_8_G);
  mpu.setGyroRange(MPU6050_RANGE_500_DEG);
  mpu.setFilterBandwidth(MPU6050_BAND_21_HZ);

  delay(100);
}

void loop() {
  sensors_event_t a, g, temp;
  mpu.getEvent(&a, &g, &temp);

  Serial.print("Accel X: ");
  Serial.print(a.acceleration.x, 2);
  Serial.print(" m/s^2, Y: ");
  Serial.print(a.acceleration.y, 2);
  Serial.print(" m/s^2, Z: ");
  Serial.print(a.acceleration.z, 2);
  Serial.println(" m/s^2");

  Serial.print("Gyro X: ");
  Serial.print(g.gyro.x, 2);
  Serial.print(" rad/s, Y: ");
  Serial.print(g.gyro.y, 2);
  Serial.print(" rad/s, Z: ");
  Serial.print(g.gyro.z, 2);
  Serial.println(" rad/s");

  Serial.print("Temperature: ");
  Serial.print(temp.temperature, 1);
  Serial.println(" degC");
  Serial.println("------------------------------------");

  delay(500);
}Bibliothèques nécessaires : Adafruit MPU6050 2.2.9, Adafruit Unified Sensor 1.1.15
Wiring diagram and example code generated by Codey.online — https://www.codey.online





 English
  Nederlands
  Deutsch
  Italiano
  Español
  Suomi
Suomi  Polski
  Dansk
Dansk  Ελληνικά
  Български
  Čeština
  Hrvatski
  Aileen