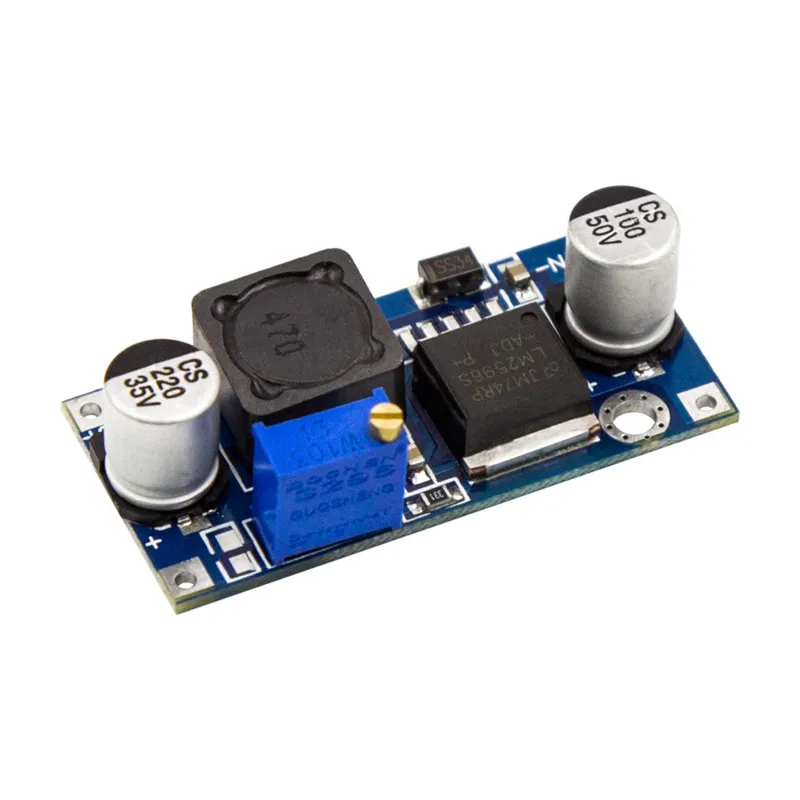
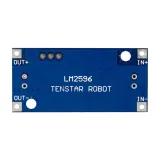
SKU: OT2073-B48 Numéro d’article: AA104 EAN: 4772496877447

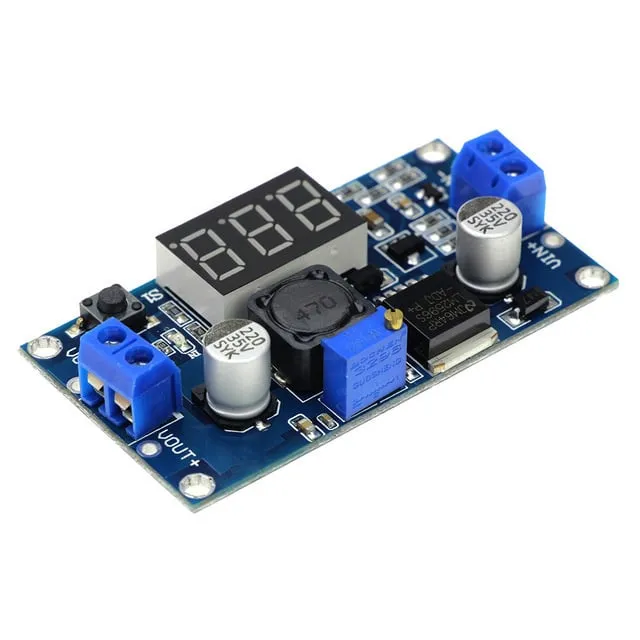
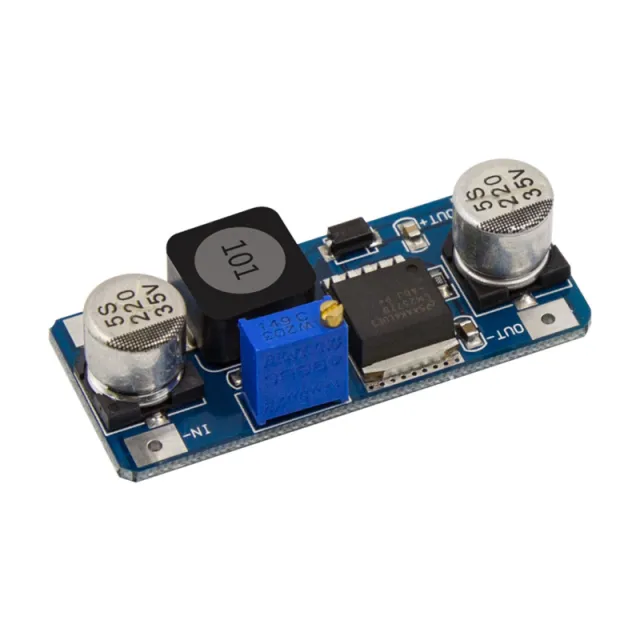
Avec le module abaisseur LM2596, vous pouvez convertir une tension d’entrée DC comprise entre 3V et 40V en une tension de sortie DC réglable de 1,5V à 35V. Le module LM2596 stabilise la tension de sortie et reste stable tant que la tension d’entrée n’est pas inférieure de plus de 10 % à la tension de sortie. Cela peut être utile, par exemple, pour alimenter des appareils électroniques fonctionnant à une tension inférieure à la tension d’alimentation standard. Le module LM2596 est équipé d’un potentiomètre permettant d’ajuster facilement la tension de sortie.
Le module a un courant de sortie maximal de 3A avec un rendement allant jusqu’à 92 %. Le LM2596 dispose de fonctions de protection intégrées (telles que contre la surchauffe, la surintensité et les courts-circuits) afin de garantir que votre équipement soit alimenté en toute sécurité.
Spécifications techniques :
- Tension d’entrée : 3V - 40V DC
- Tension de sortie : 1,5V - 35V DC (réglable)
- Courant de sortie maximal : 3A
- Rendement : jusqu’à 92 %
- Fonctions de protection intégrées (surchauffe, surintensité, court-circuit)
- Dimensions : 43mm x 21mm x 14mm
Voici comment connecter le Module abaisseur réglable 3-40 VCC vers 1,5-35 VCC LM2596 à un Arduino UNO ou à un ESP32, avec un exemple de sketch que tu peux téléverser directement.
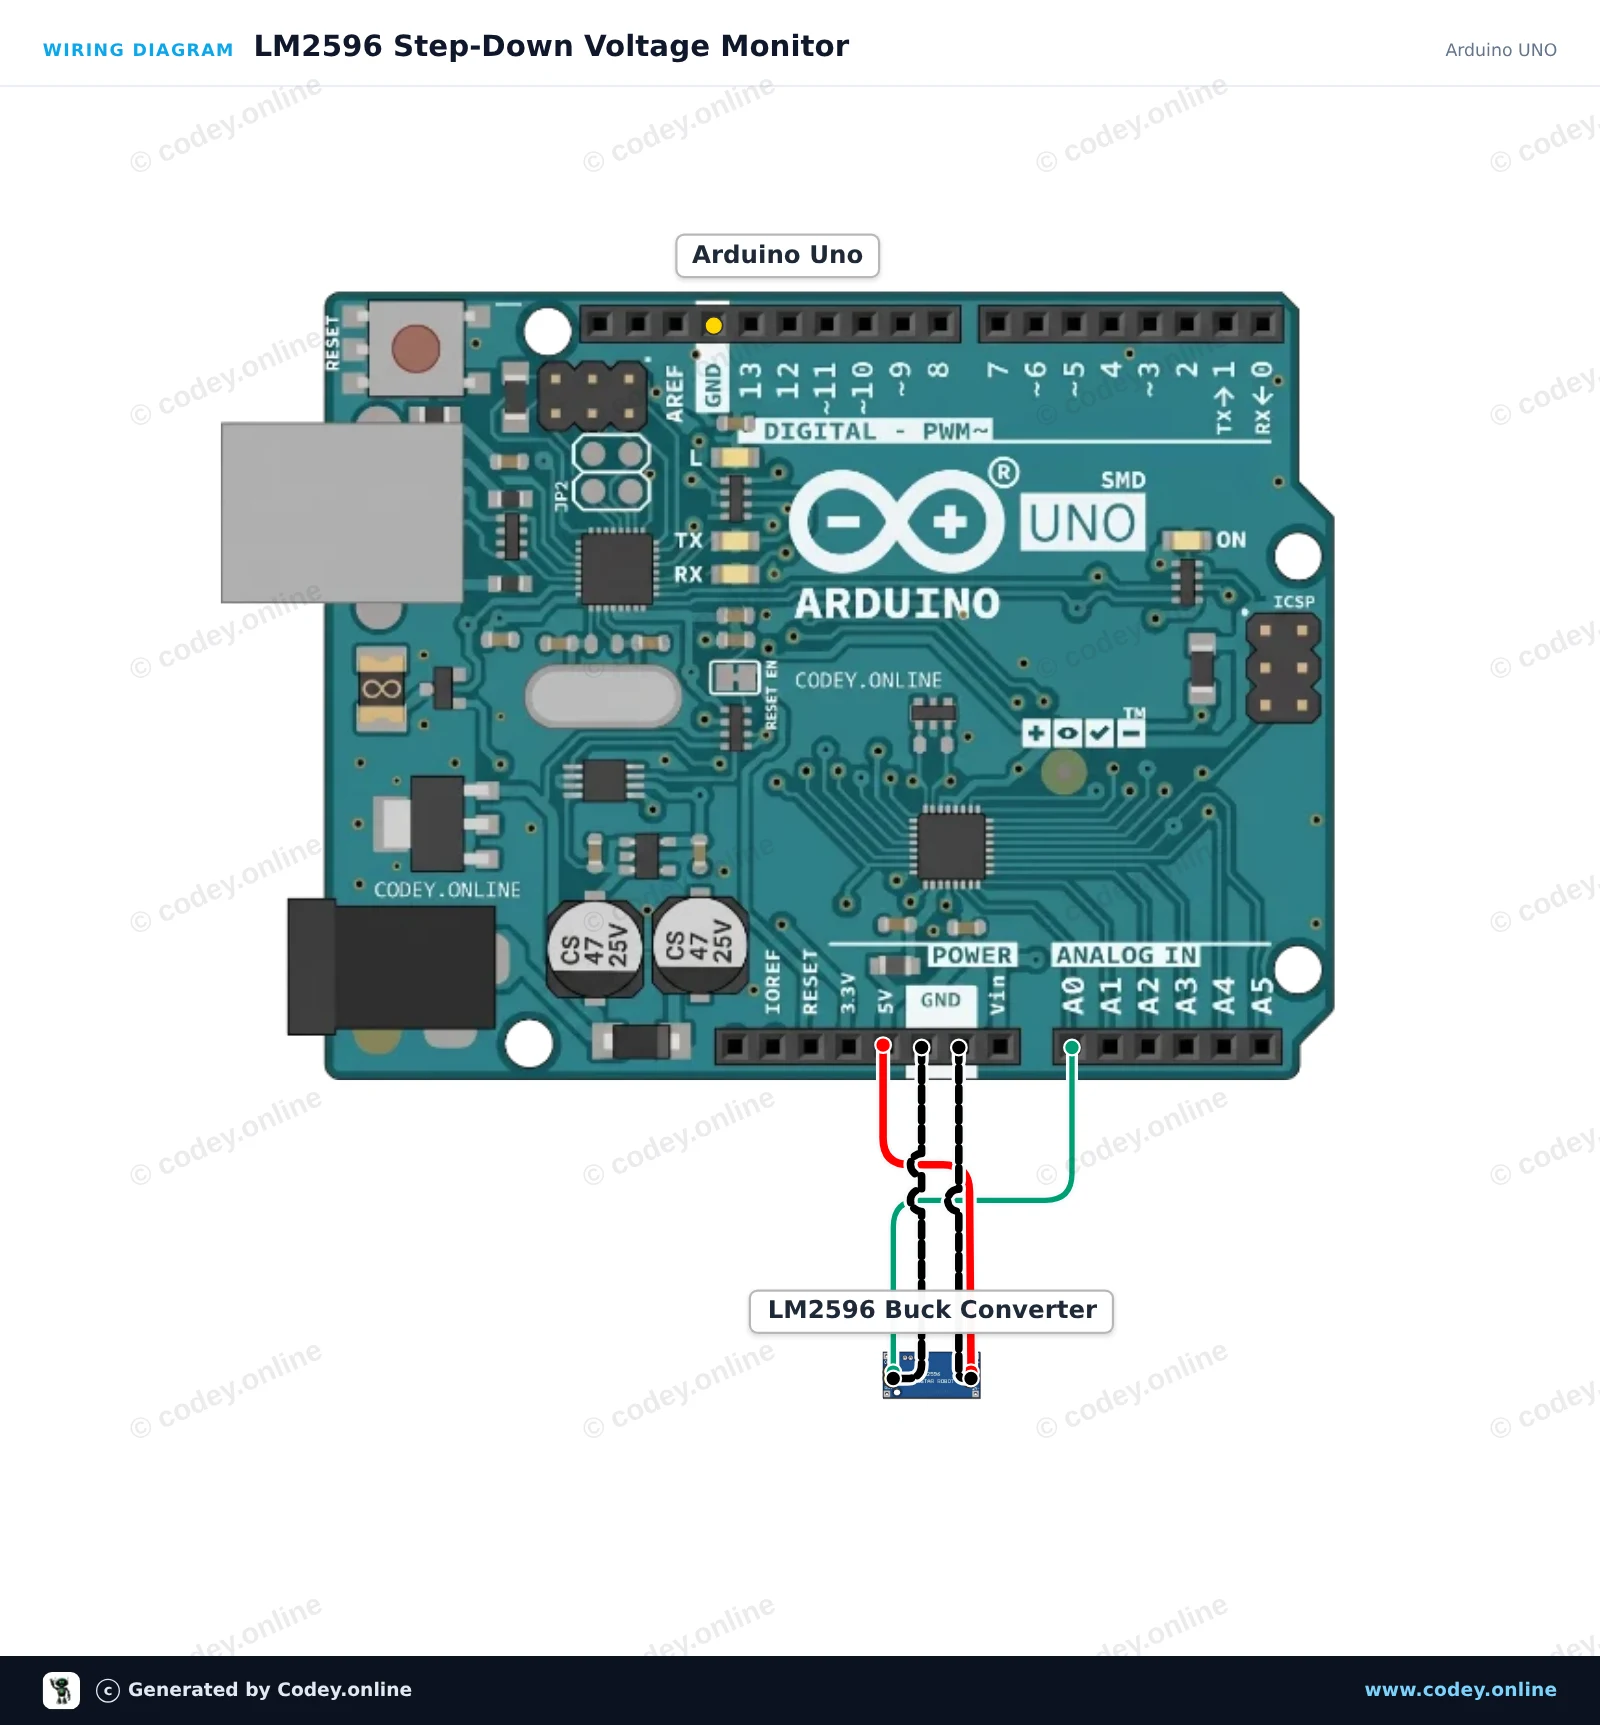
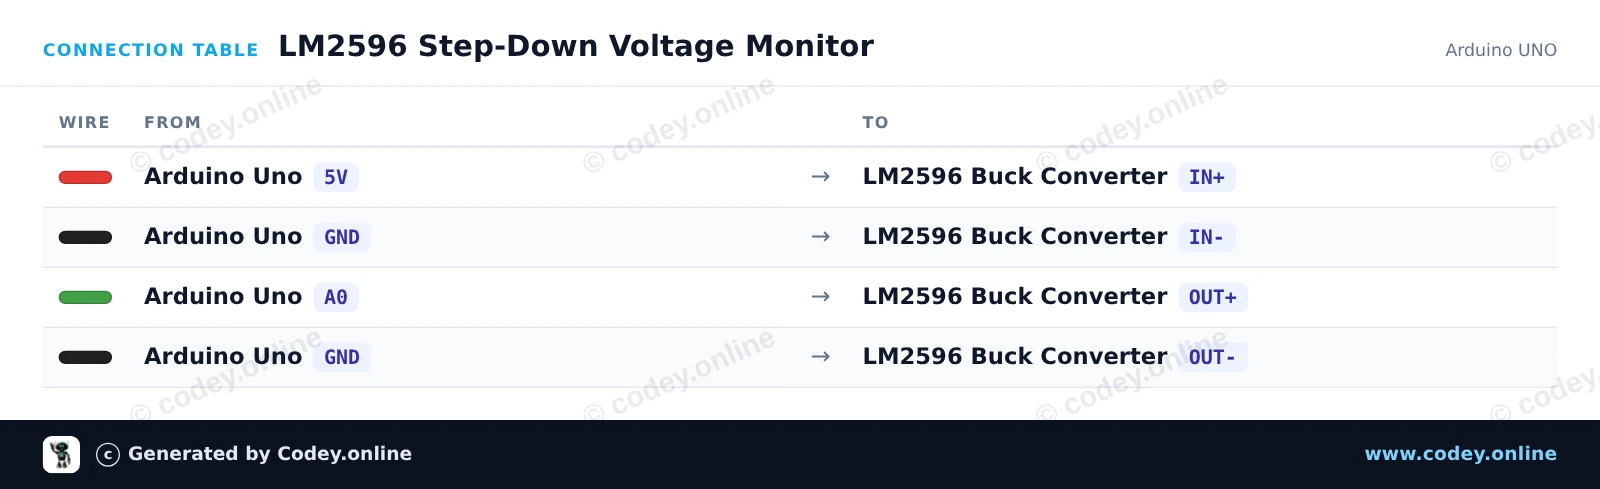
Ce projet surveille la tension de sortie du convertisseur abaisseur réglable LM2596 à l'aide de la broche analogique A0. Alimentez le module depuis la broche Arduino 5V/VIN et tournez le potentiomètre intégré pour voir la tension mesurée se mettre à jour dans le Serial Monitor (assurez-vous que la tension de sortie ne dépasse pas 5V).
/*
 * ==================================================================
 *  Generated by Codey.online  —  https://www.codey.online
 * ==================================================================
 *  Project   : LM2596 Step-Down Voltage Monitor
 *  Board     : Arduino UNO (arduino:avr:uno)
 *  Parts     : Adjustable Step-down Module 3-40VDC 1.5-35VDC LM2596
 *  Libraries : none (built-in)
 *
 *  Codey Online is an AI-powered browser IDE for Arduino and ESP32.
 *  Describe your project and Codey writes the code, draws the wiring
 *  diagram and uploads it to your board, straight from the browser.
 *  This code is free to use, modify and share, without warranty.
 * ==================================================================
 */

// LM2596 Buck Converter Voltage Monitor
// Reads the regulated output on analog pin A0.
// Note: Keep the output voltage at or below 5.0V to protect the analog pin.

const int sensePin = A0;

void setup() {
  Serial.begin(115200);
  while (!Serial) {
    ; // Wait for Serial Monitor
  }
  Serial.println(F("LM2596 Step-Down Voltage Monitor Initialized"));
  Serial.println(F("Adjust the trimmer potentiometer on the module."));
}

void loop() {
  int rawValue = analogRead(sensePin);
  float voltage = rawValue * (5.0 / 1023.0);

  Serial.print(F("ADC Value: "));
  Serial.print(rawValue);
  Serial.print(F(" | Output Voltage: "));
  Serial.print(voltage, 2);
  Serial.println(F(" V"));

  delay(500);
}Wiring diagram and example code generated by Codey.online — https://www.codey.online
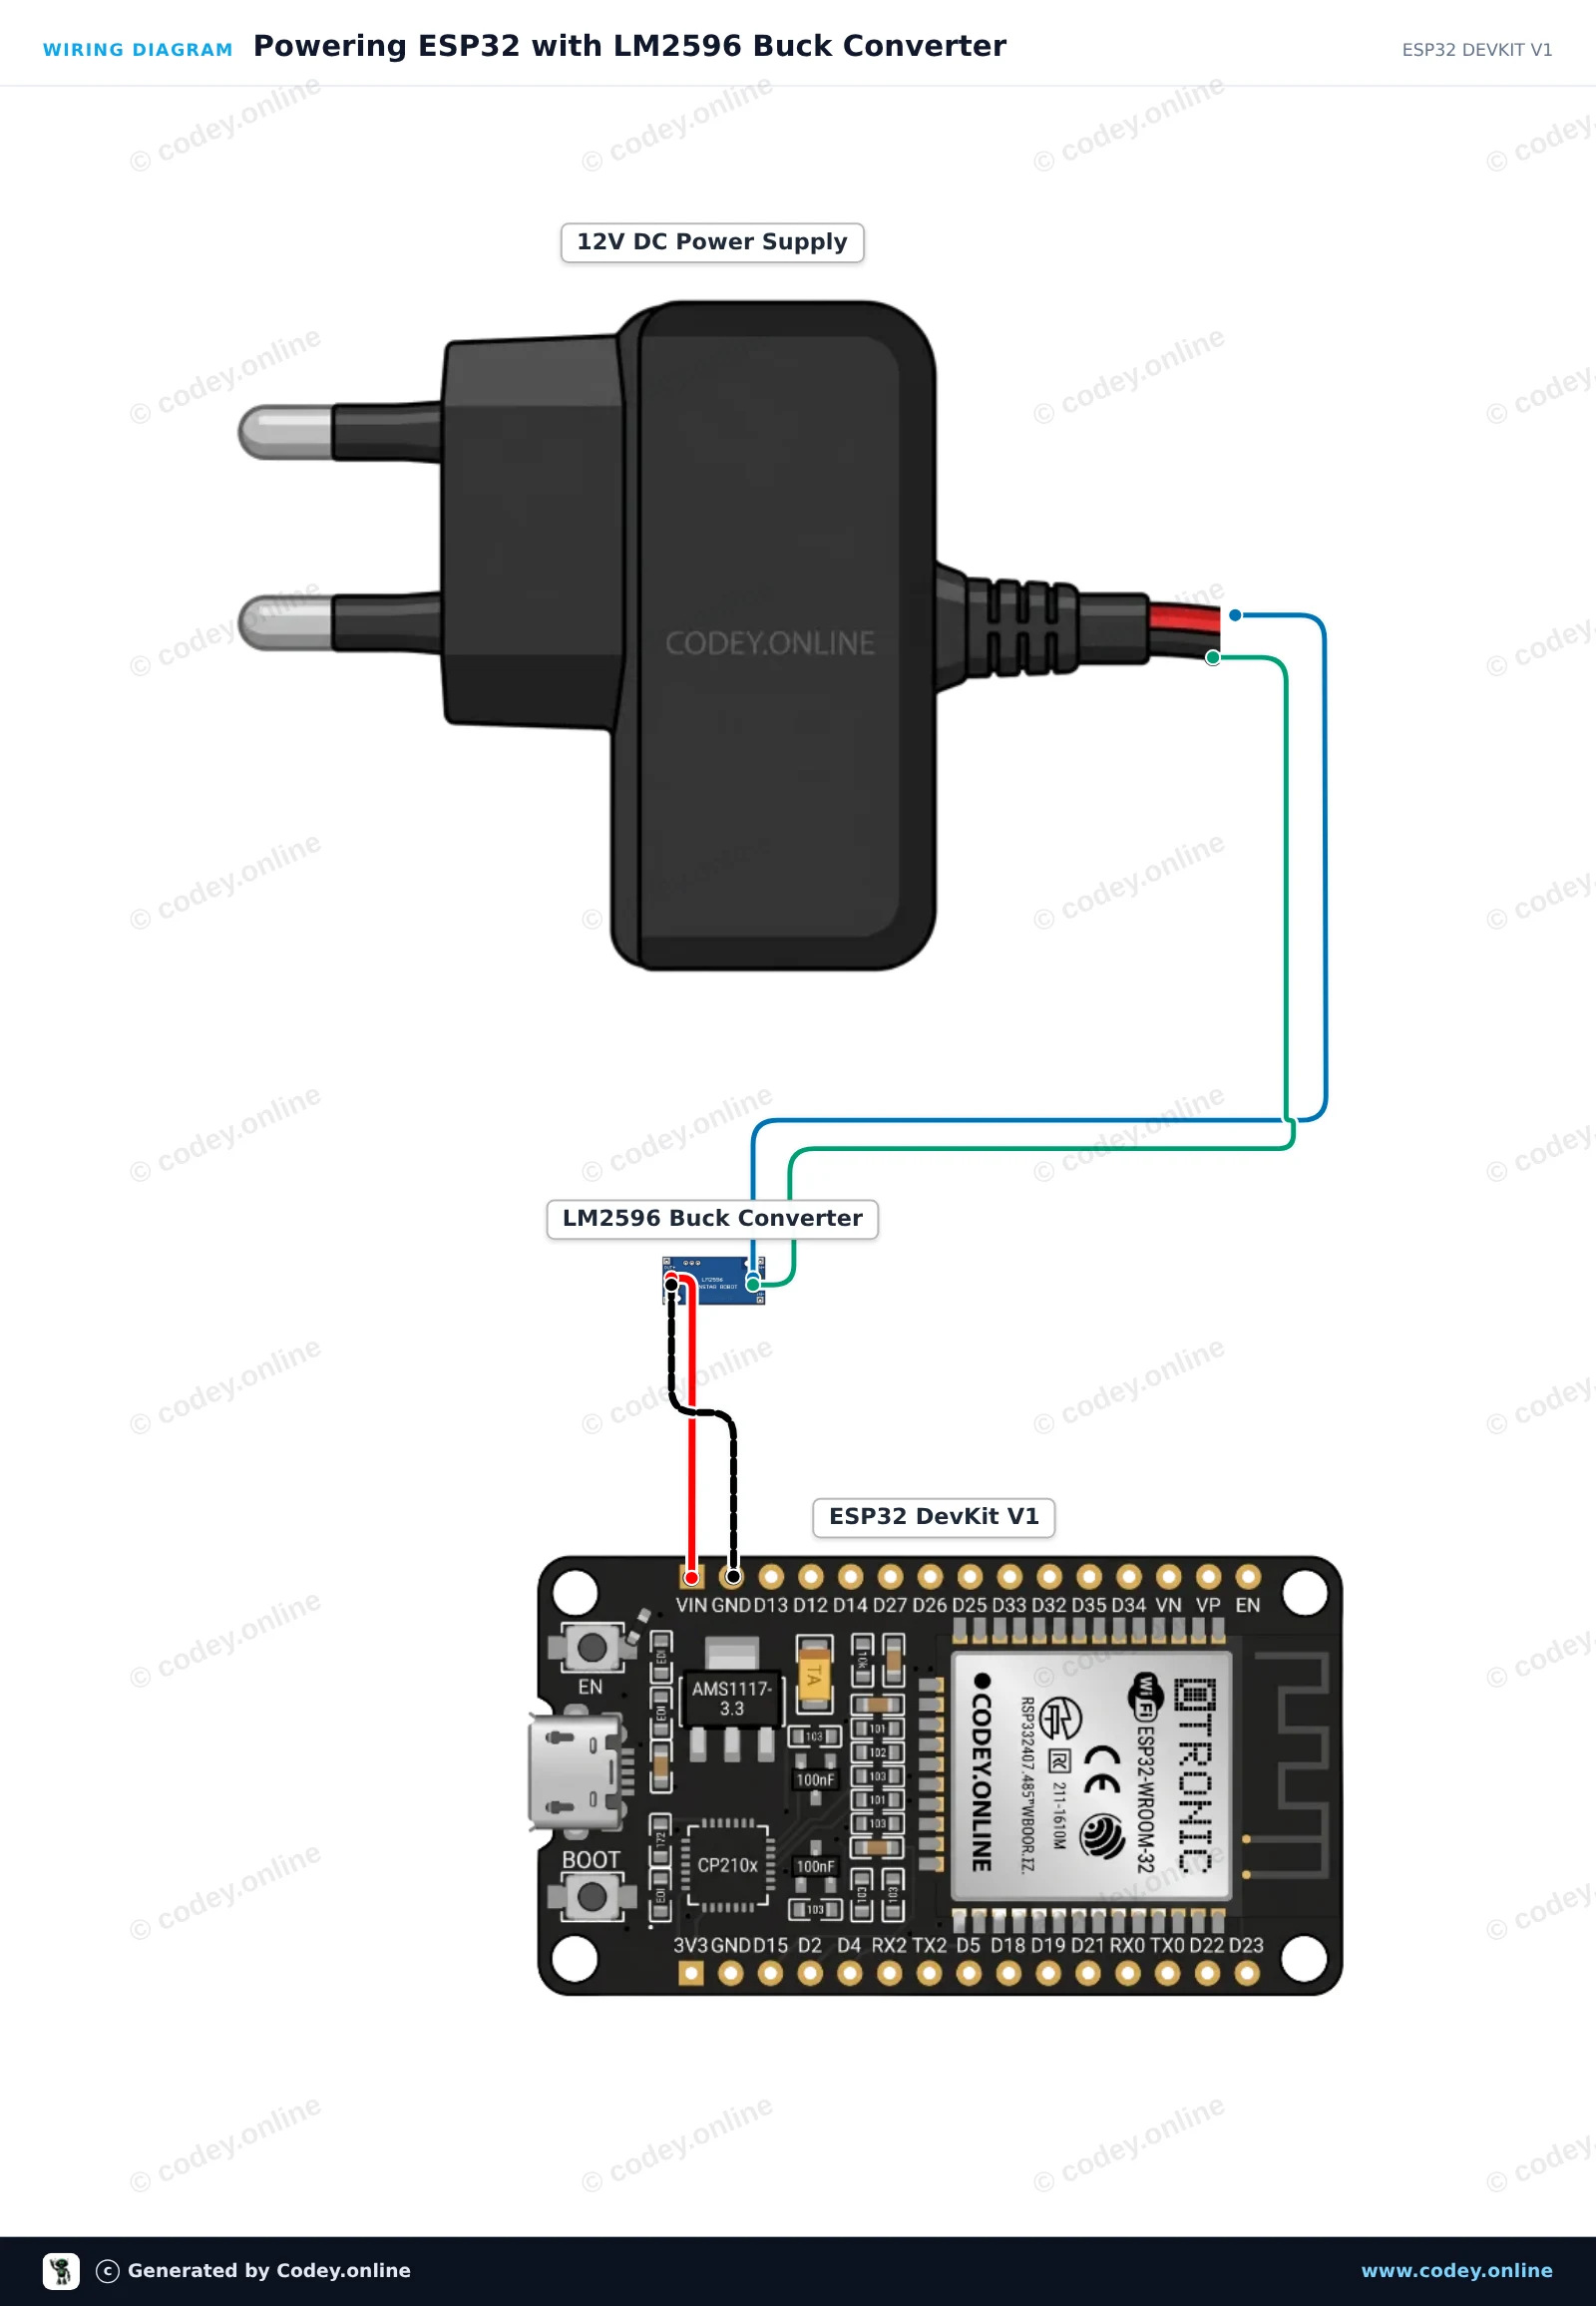
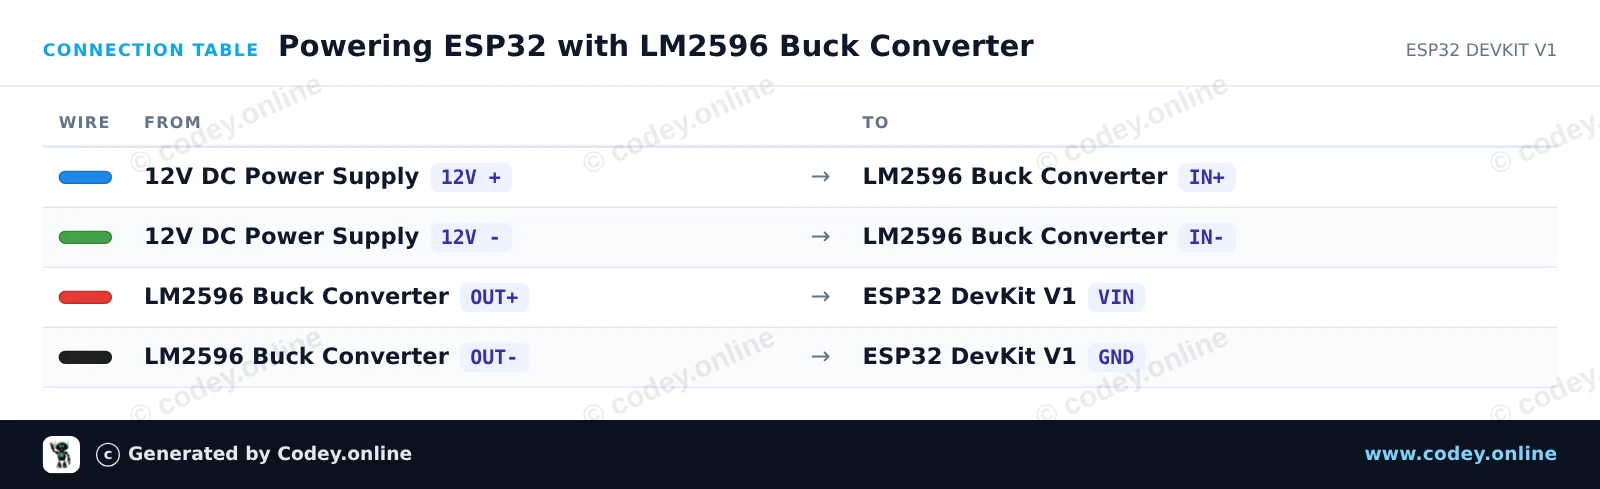
Ce montage utilise le module abaisseur LM2596 pour réguler une alimentation DC de 12V vers 5V afin d'alimenter l'ESP32 via sa broche VIN. Avant de connecter la sortie à l'ESP32, utilisez un multimètre et tournez le potentiomètre ajustable intégré jusqu'à ce que la sortie mesure exactement 5.0V. L'ESP32 fait clignoter sa LED d'état intégrée et indique son temps de fonctionnement via Serial afin de confirmer un fonctionnement stable.
/*
 * ==================================================================
 *  Generated by Codey.online  —  https://www.codey.online
 * ==================================================================
 *  Project   : Powering ESP32 with LM2596 Buck Converter
 *  Board     : ESP32 DEVKIT V1 (esp32:esp32:esp32doit-devkit-v1)
 *  Parts     : Adjustable Step-down Module 3-40VDC 1.5-35VDC LM2596
 *  Libraries : none (built-in)
 *
 *  Codey Online is an AI-powered browser IDE for Arduino and ESP32.
 *  Describe your project and Codey writes the code, draws the wiring
 *  diagram and uploads it to your board, straight from the browser.
 *  This code is free to use, modify and share, without warranty.
 * ==================================================================
 */

// Onboard LED on ESP32 DevKit V1 is on GPIO 2
const int LED_PIN = 2;

void setup() {
  Serial.begin(115200);
  pinMode(LED_PIN, OUTPUT);

  Serial.println("LM2596 Step-Down Module ESP32 Power Demo");
}

void loop() {
  digitalWrite(LED_PIN, HIGH);
  Serial.print("ESP32 running stably on buck converter power. Uptime: ");
  Serial.print(millis() / 1000);
  Serial.println(" s");
  delay(1000);

  digitalWrite(LED_PIN, LOW);
  delay(1000);
}Wiring diagram and example code generated by Codey.online — https://www.codey.online







 English
  Nederlands
  Deutsch
  Italiano
  Español
  Suomi
Suomi  Polski
  Dansk
Dansk  Ελληνικά
  Български
  Čeština
  Hrvatski
  Aileen