SKU: OT2044-D79 Numéro d’article: AA440 EAN: 8720589817333

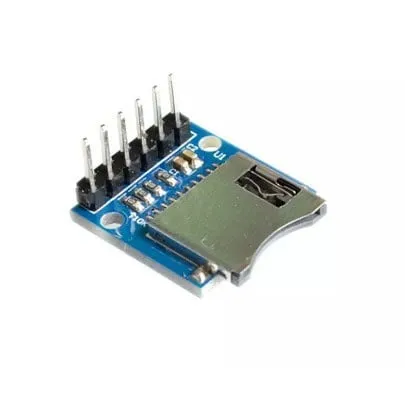
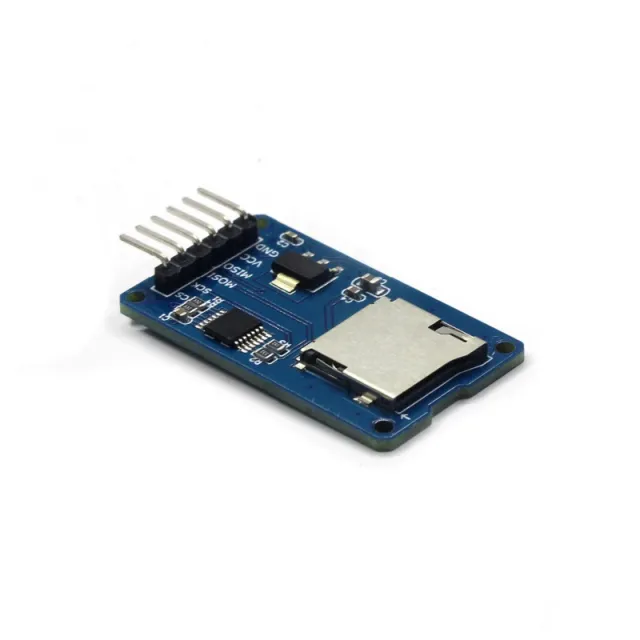
Module simple lecteur de carte MicroSD. Grâce à son fonctionnement en 3,3V, elle convient parfaitement par exemple à une ESP32 ou une ESP8266. Le module est équipé des résistances pull-up 10K nécessaires sur les lignes de données.
Spécifications :
– Tension de fonctionnement : 3,3V
- Type de slot micro SD : Push-Pull
– Interface : SPI
– Tension de fonctionnement (niveau logique) : 3,3V
Broches déjà pré-soudées.
Dimensions
Longueur : 2cm
Largeur : 1,8cm
Hauteur : 1,1cm
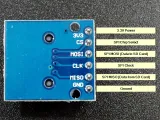
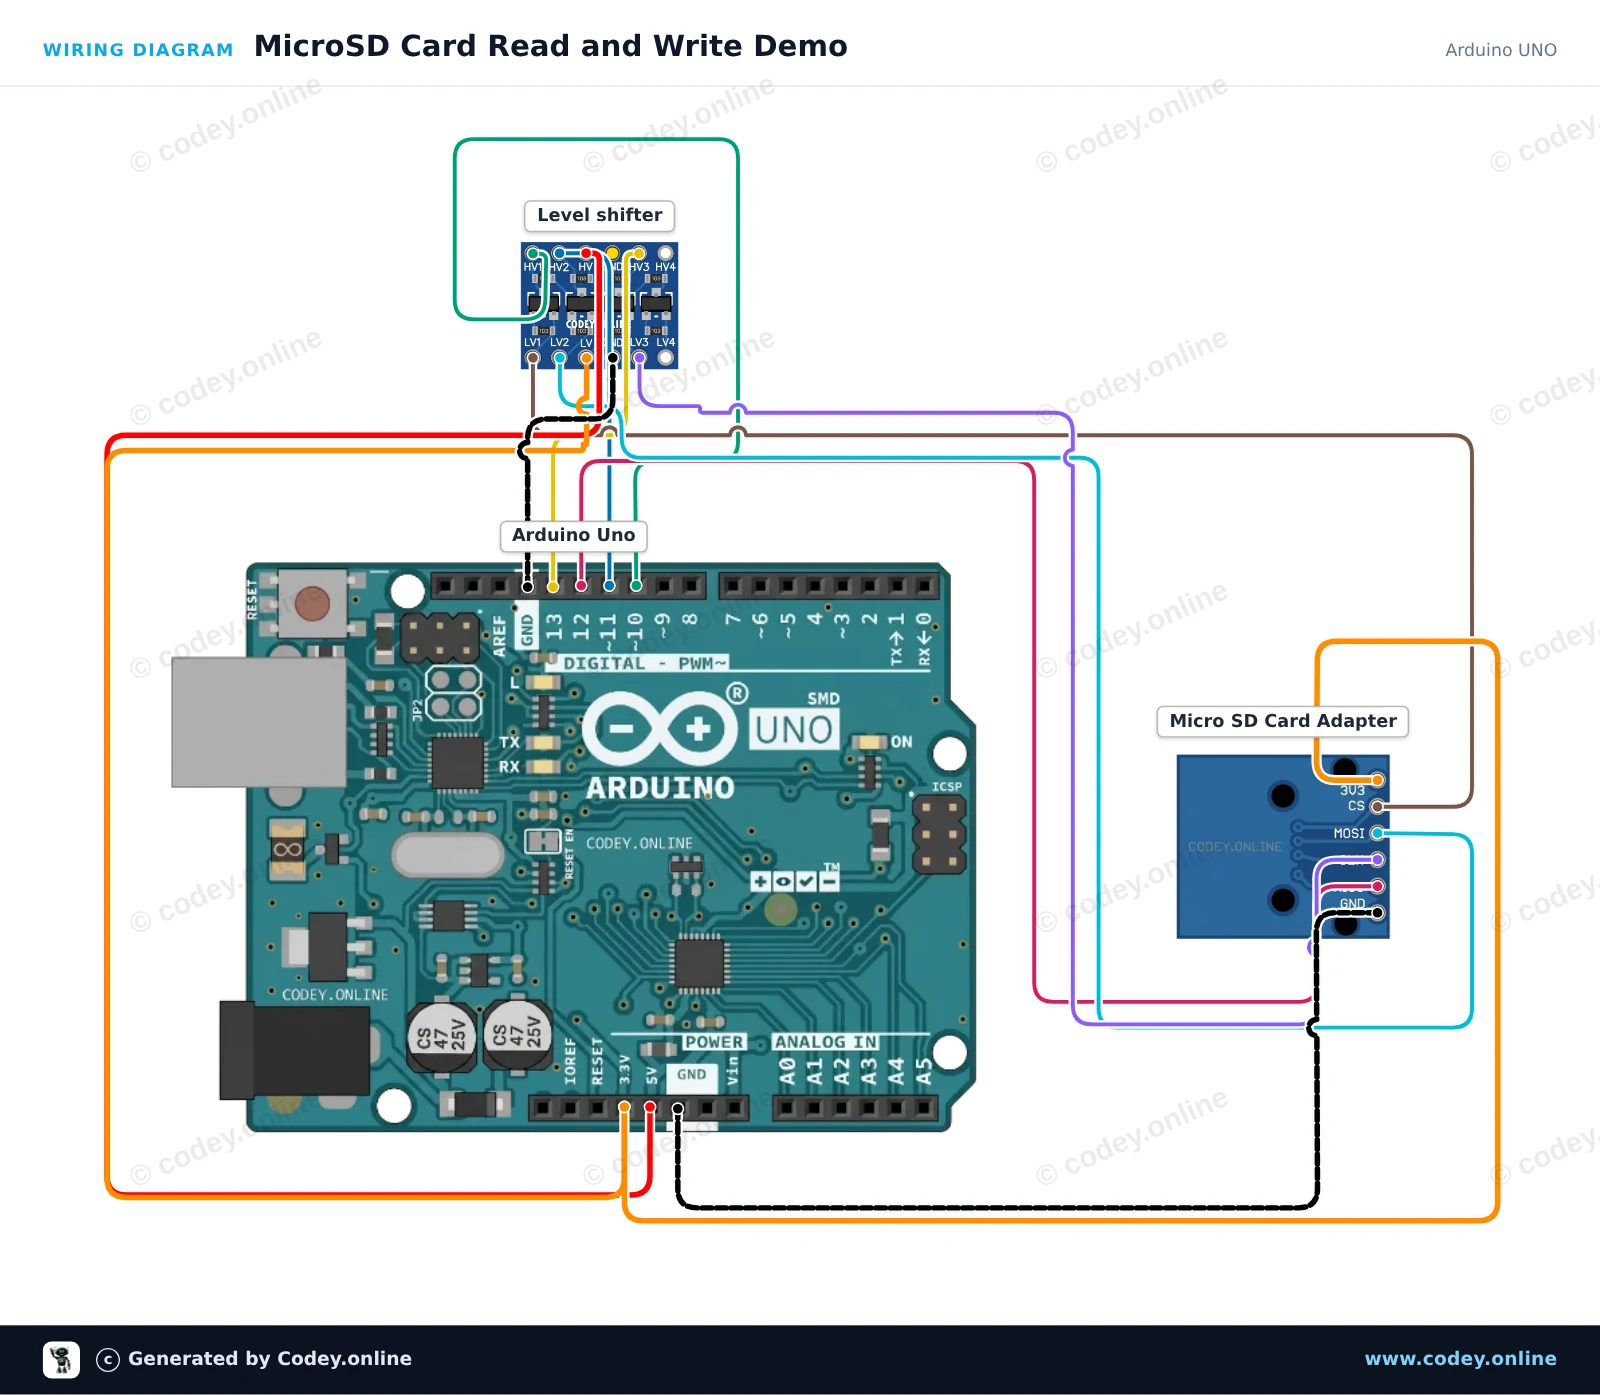
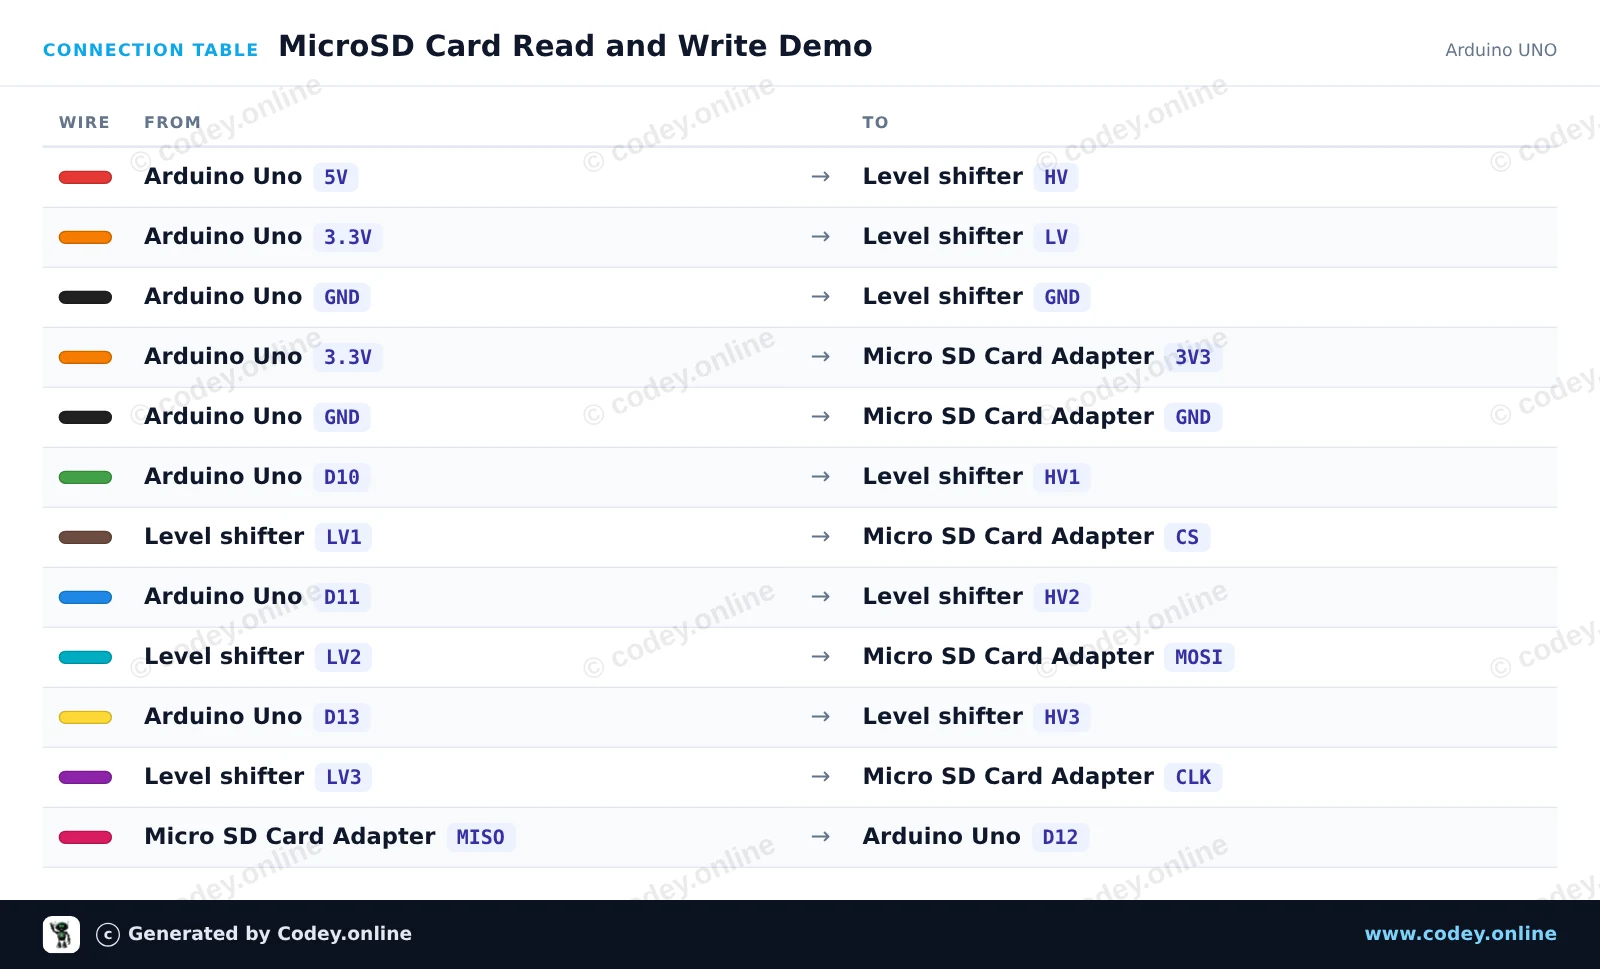
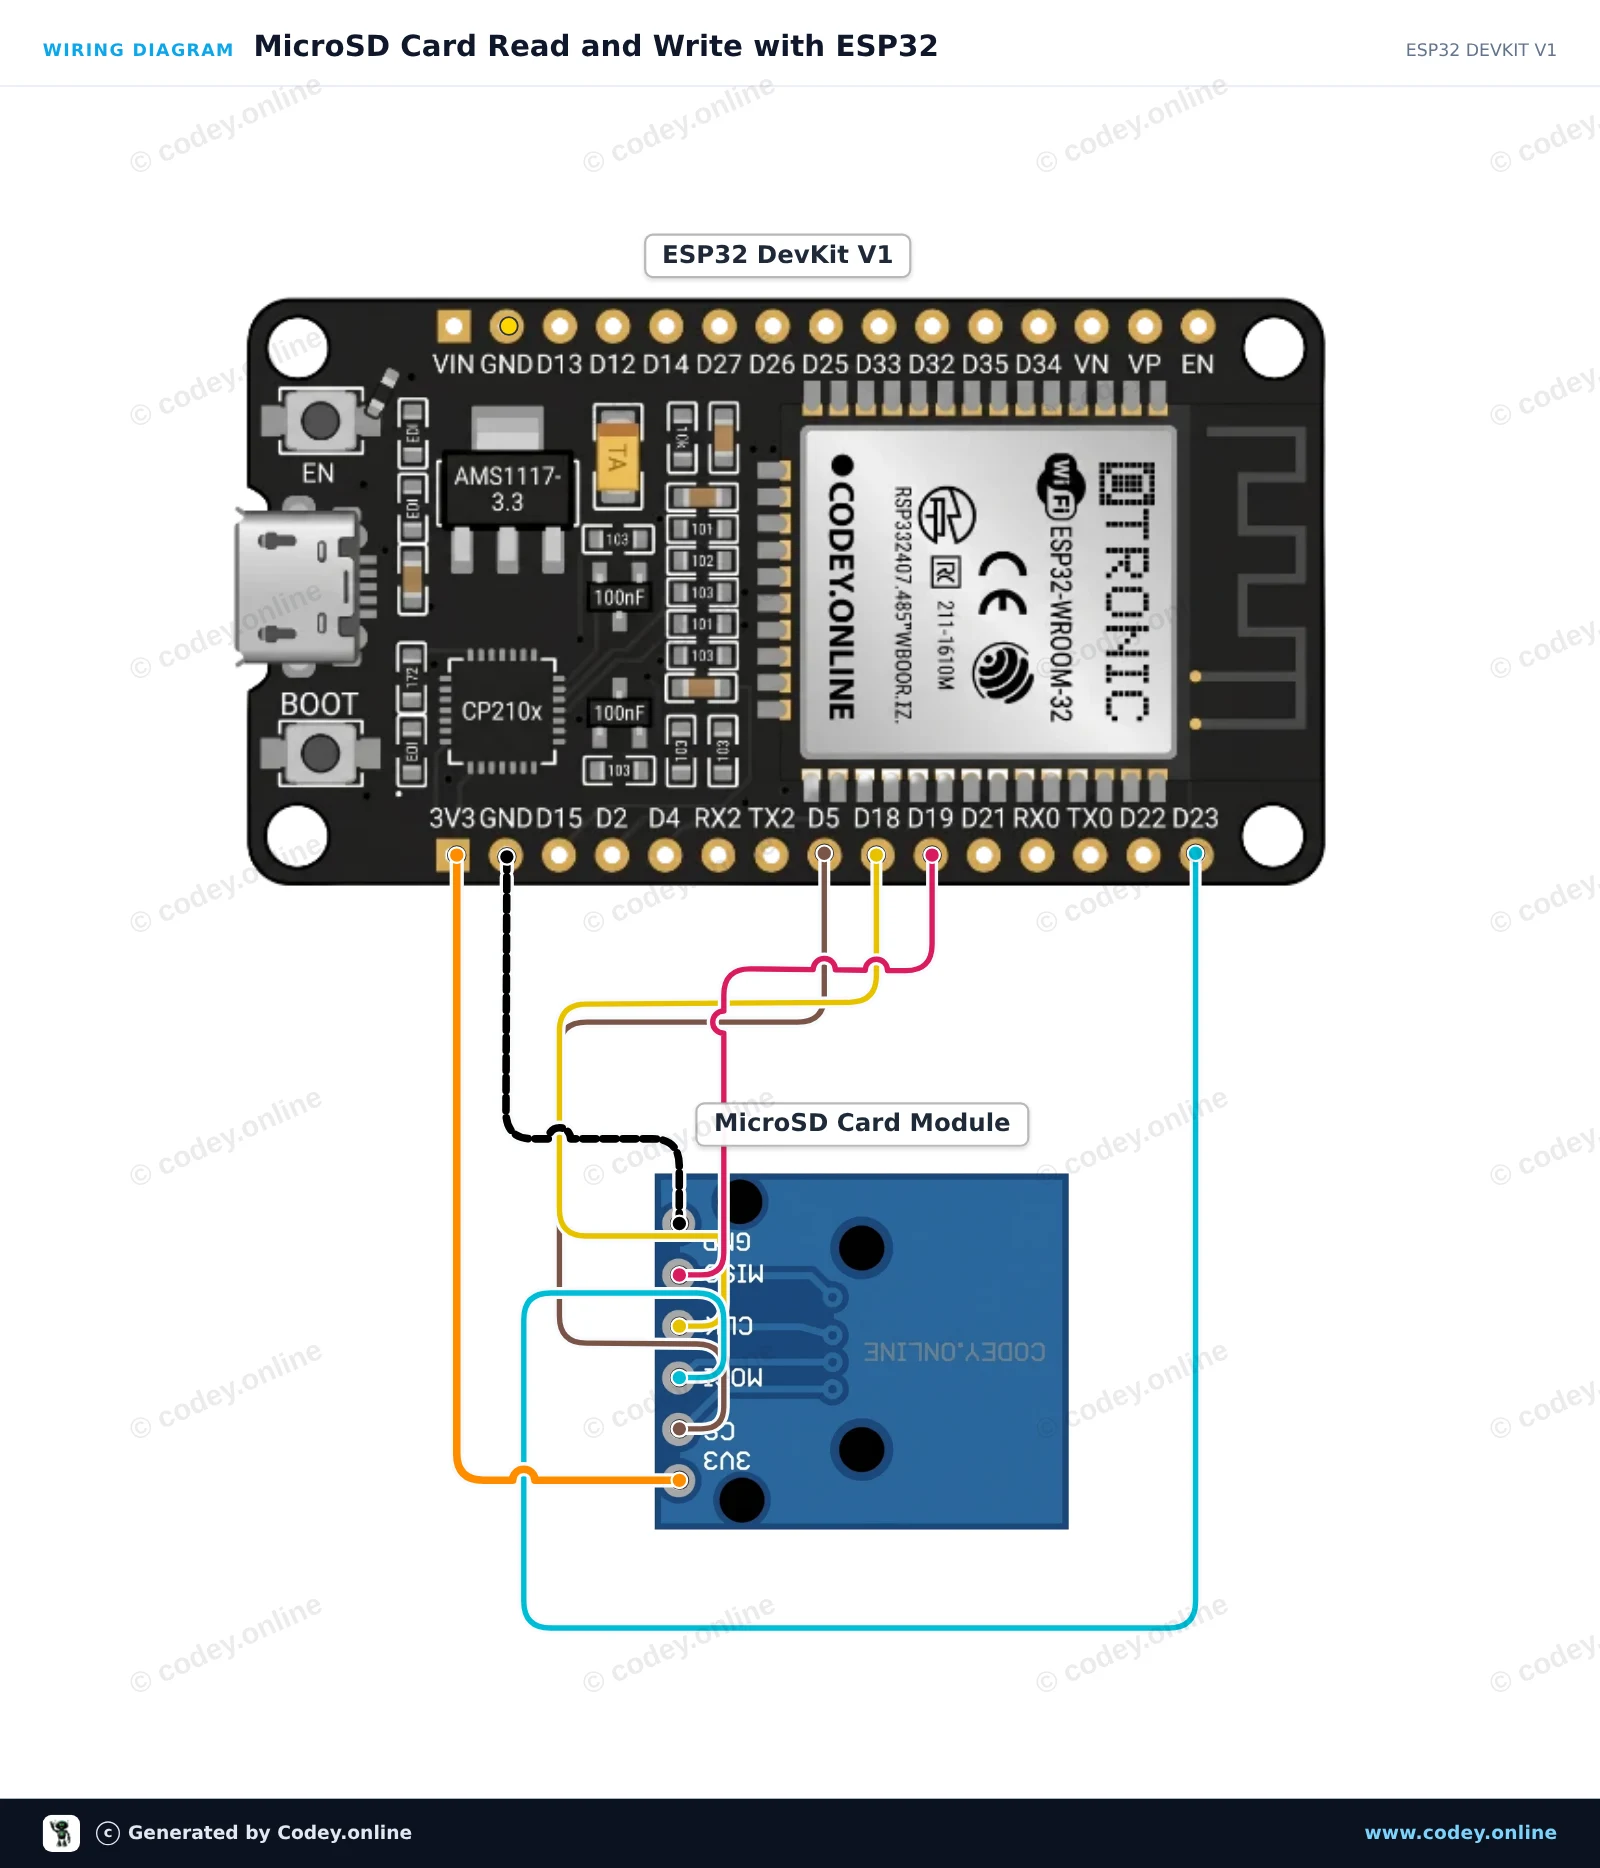
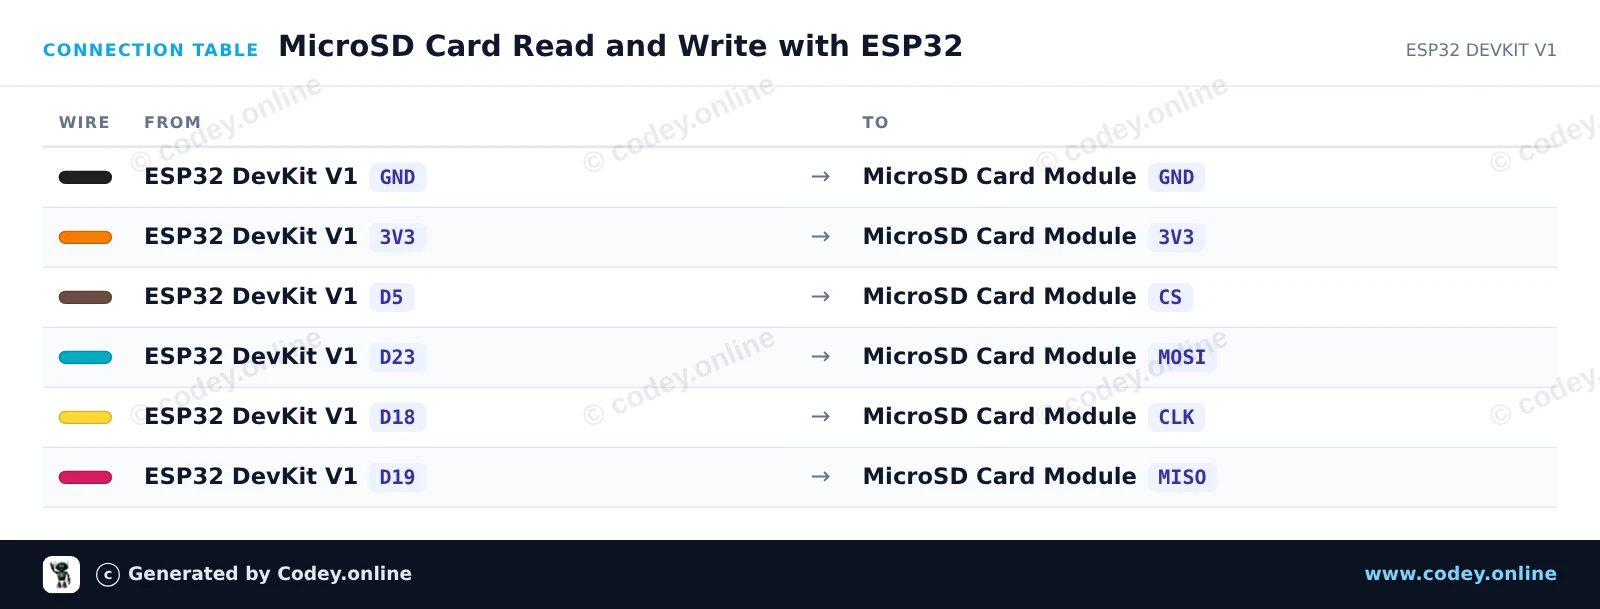
Voici comment connecter le Module de carte Micro SD 3,3 V pour ESP32 | ESP8266 à un Arduino UNO ou à un ESP32, avec un exemple de sketch que tu peux téléverser directement.
Ce projet montre comment écrire du texte sur une carte microSD et le relire via SPI. Un convertisseur de niveau logique à 4 canaux abaisse en toute sécurité les signaux logiques 5V de l’Arduino Uno vers 3.3V pour le module carte microSD. Ouvrez le Serial Monitor à 115200 baud pour voir l’état d’initialisation et le contenu du fichier.
/*
 * ==================================================================
 *  Generated by Codey.online  —  https://www.codey.online
 * ==================================================================
 *  Project   : MicroSD Card Read and Write Demo
 *  Board     : Arduino UNO (arduino:avr:uno)
 *  Parts     : Micro SD Card Adapter Module 3.3V
 *  Libraries : none (built-in)
 *
 *  Codey Online is an AI-powered browser IDE for Arduino and ESP32.
 *  Describe your project and Codey writes the code, draws the wiring
 *  diagram and uploads it to your board, straight from the browser.
 *  This code is free to use, modify and share, without warranty.
 * ==================================================================
 */

#include <SPI.h>
#include <SD.h>

const int chipSelect = 10;

void setup() {
  Serial.begin(115200);
  while (!Serial) {
    ; // Wait for serial port to connect
  }

  Serial.println(F("Initializing SD card..."));

  if (!SD.begin(chipSelect)) {
    Serial.println(F("Initialization failed! Check connections & SD card."));
    return;
  }
  Serial.println(F("Initialization done."));

  // Write to file
  File myFile = SD.open("demo.txt", FILE_WRITE);
  if (myFile) {
    Serial.println(F("Writing to demo.txt..."));
    myFile.println(F("MicroSD card read/write test successful!"));
    myFile.close();
    Serial.println(F("Done writing."));
  } else {
    Serial.println(F("Error opening demo.txt for writing."));
  }

  // Read from file
  myFile = SD.open("demo.txt");
  if (myFile) {
    Serial.println(F("Contents of demo.txt:"));
    while (myFile.available()) {
      Serial.write(myFile.read());
    }
    myFile.close();
  } else {
    Serial.println(F("Error opening demo.txt for reading."));
  }
}

void loop() {
  // Idle
}Wiring diagram and example code generated by Codey.online — https://www.codey.online
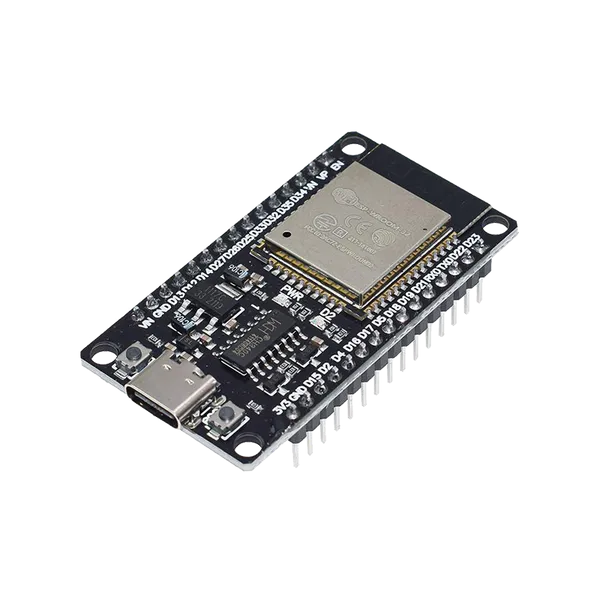
Cet exemple montre comment interfacer un module de carte MicroSD 3.3V avec l'ESP32 en utilisant le bus SPI matériel par défaut (VSPI). Le sketch initialise la carte SD, écrit un message de test dans un fichier et le relit pour l'afficher dans le Serial Monitor.
/*
 * ==================================================================
 *  Generated by Codey.online  —  https://www.codey.online
 * ==================================================================
 *  Project   : MicroSD Card Read and Write with ESP32
 *  Board     : ESP32 DEVKIT V1 (esp32:esp32:esp32doit-devkit-v1)
 *  Parts     : Micro SD Card Adapter Module 3.3V
 *  Libraries : none (built-in)
 *
 *  Codey Online is an AI-powered browser IDE for Arduino and ESP32.
 *  Describe your project and Codey writes the code, draws the wiring
 *  diagram and uploads it to your board, straight from the browser.
 *  This code is free to use, modify and share, without warranty.
 * ==================================================================
 */

#include "FS.h"
#include "SD.h"
#include "SPI.h"

const int chipSelect = 5;

void setup() {
  Serial.begin(115200);
  while (!Serial) { delay(10); }

  Serial.println("\n--- MicroSD Card Demo ---");

  // Initialize SD card on default VSPI pins (CS = GPIO 5)
  if (!SD.begin(chipSelect)) {
    Serial.println("Card Mount Failed! Check wiring and make sure card is FAT32 formatted.");
    return;
  }

  uint8_t cardType = SD.cardType();
  if (cardType == CARD_NONE) {
    Serial.println("No SD card attached.");
    return;
  }

  Serial.print("SD Card Type: ");
  if (cardType == CARD_MMC) {
    Serial.println("MMC");
  } else if (cardType == CARD_SD) {
    Serial.println("SDSC");
  } else if (cardType == CARD_SDHC) {
    Serial.println("SDHC");
  } else {
    Serial.println("UNKNOWN");
  }

  uint64_t cardSize = SD.cardSize() / (1024 * 1024);
  Serial.printf("SD Card Size: %lluMB\n", cardSize);

  // Write to a test file
  Serial.println("Writing to test.txt...");
  File file = SD.open("/test.txt", FILE_WRITE);
  if (file) {
    file.println("Hello from ESP32!");
    file.println("MicroSD read/write test successful.");
    file.close();
    Serial.println("Write complete.");
  } else {
    Serial.println("Failed to open file for writing.");
    return;
  }

  // Read back the test file
  Serial.println("Reading from test.txt:");
  file = SD.open("/test.txt");
  if (file) {
    while (file.available()) {
      Serial.write(file.read());
    }
    file.close();
  } else {
    Serial.println("Failed to open file for reading.");
  }
}

void loop() {
  // Nothing to repeat in this test
  delay(1000);
}Wiring diagram and example code generated by Codey.online — https://www.codey.online





 English
  Nederlands
  Deutsch
  Italiano
  Español
  Suomi
Suomi  Polski
  Dansk
Dansk  Ελληνικά
  Български
  Čeština
  Hrvatski
  Aileen